Instead of providing detailed instructions on each step, this chapter emphasizes the overall process. Each section may reference other places within this document or other PowerServer documents and support information.
If your goal is to write a completely new PowerBuilder application and deploy it to the Web, first refer to Web RAD with PowerBuilder and PowerServer, and then refer to instructions in this chapter for migrating the new PowerBuilder application to the Web.
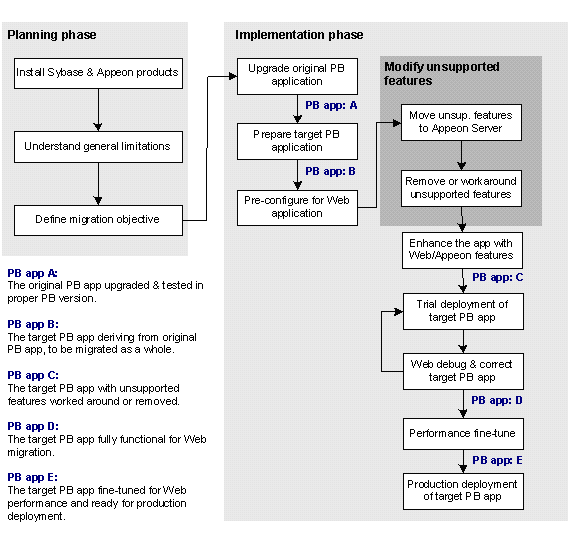
The following figure illustrates the general process of deploying an existing PowerBuilder application to the Web. The process is divided into two phases:
-
Phase One: Planning - Evaluating strategies for your Web migration objective.
Step 1: Install required software
Step 2: Understand the general limitations of the PowerServer solution
Step 3: Define migration objective
-
Phase Two: Implementation - Implementing your Web migration objective.
Step 4: Upgrade the original PowerBuilder application
Step 5: Prepare the target PowerBuilder application
Step 6: Pre-configure for Web application
Step 7: Remove or workaround unsupported features
Step 8: Enhance the application with Web or PowerServer features
Step 9: Trial deployments
Step 10: Debug Web application
Step 11: Performance fine-tune
Step 12: Go-live deployment
Step 13: Go live


