About this chapter
This chapter describes how to troubleshoot your database connection in PowerBuilder by using the following tools:
-
Database Trace
-
SQL Statement Trace
-
ODBC Driver Manager Trace
-
JDBC Driver Manager Trace
When you use PowerBuilder, there are several tools available to trace your database connection in order to troubleshoot problems.
|
Use this tool |
To trace a connection to |
|---|---|
|
Database Trace |
Any database that PowerBuilder accesses through one of the database interfaces |
|
ODBC Driver Manager Trace |
An ODBC data source only |
|
JDBC Driver Manager Trace |
A JDBC database only |
This section describes how to use the Database Trace tool.
The Database Trace tool records the internal commands that PowerBuilder executes while accessing a database. You can trace a database connection in the development environment or in a PowerBuilder application that connects to a database.
PowerBuilder writes the output of Database Trace to a log file named DBTRACE.LOG (by default) or to a nondefault log file that you specify. When you enable database tracing for the first time, PowerBuilder creates the log file on your computer. Tracing continues until you disconnect from the database.
Using the Database Trace tool with one connection
You can use the Database Trace tool for only one DBMS at a time and for one database connection at a time.
For example, if your application connects to both an ODBC data source and an Adaptive Server Enterprise database, you can trace either the ODBC connection or the Adaptive Server Enterprise connection, but not both connections at the same time.
You can use information from the Database Trace tool to understand what PowerBuilder is doing internally when you work with your database. Examining the information in the log file can help you:
-
Understand how PowerBuilder interacts with your database
-
Identify and resolve problems with your database connection
-
Provide useful information to Technical Support if you call them for help with your database connection
If you are familiar with PowerBuilder and your DBMS, you can use the information in the log to help troubleshoot connection problems on your own. If you are less experienced or need help, run the Database Trace tool before you call Technical Support. You can then report or send the results of the trace to the Technical Support representative who takes your call.
Default contents of the trace file
By default, the Database Trace tool records the following information in the log file when you trace a database connection:
-
Parameters used to connect to the database
-
Time to perform each database operation (in microseconds)
-
The internal commands executed to retrieve and display table and column information from your database. Examples include:
-
Preparing and executing SQL statements such as SELECT, INSERT, UPDATE, and DELETE
-
Getting column descriptions
-
Fetching table rows
-
Binding user-supplied values to columns (if your database supports bind variables)
-
Committing and rolling back database changes
-
Disconnecting from the database
-
Shutting down the database interface
-
You can opt to include the names of DBI commands and the time elapsed from the last database connection to the completion of processing for each log entry. You can exclude binding and timing information as well as the data from all fetch requests.
Database Trace dialog box selections
The Database Trace dialog box lets you select the following items for inclusion in or exclusion from a database trace file:
-
Bind variables
Metadata about the result set columns obtained from the database
-
Fetch buffers
Data values returned from each fetch request
-
DBI names
Database interface commands that are processed
-
Time to implement request
Time required to process DBI commands; the interval is measured in thousandths of milliseconds (microseconds)
-
Cumulative time
Cumulative total of timings since the database connection began; the timing measurement is in thousandths of milliseconds
Registry settings for DBTrace
The selections made in the Database Trace dialog box are saved to the registry of the machine from which the database connections are made. Windows registry settings for the database trace utility configuration are stored under the HKEY_CURRENT_USER\Software\Sybase\PowerBuilder\19.0\DBTrace key. Registry strings under this key are: ShowBindings, FetchBuffers, ShowDBINames, Timing, SumTiming, LogFileName, and ShowDialog. Except for the LogFileName string to which you can assign a full file name for the trace output file, all strings can be set to either 0 or 1.
The ShowDialog registry string can be set to prevent display of the Database Trace dialog box when a database connection is made with tracing enabled. This is the only one of the trace registry strings that you cannot change from the Database Trace dialog box. You must set ShowDialog to 0 in the registry to keep the configuration dialog box from displaying.
If you do not have access to the registry, you can use PB.INI to store trace file settings. Add a [DbTrace] section to the INI file with at least one of the following values set, then restart PowerBuilder:
[DbTrace]
ShowDBINames=0
FetchBuffers=1
ShowBindings=1
SumTiming=1
Timing=1
ShowDialog=1
LogFileName=dbtrace.log
The keywords are the same as in the registry and have the same meaning. When you connect to the database again, the initial settings are taken from the INI file, and when you modify them, the changes are written to the INI file.
If the file name for LogFileName does not include an absolute path, the log file is written to the following path, where <username> is your login ID: Users\<username>\AppData\Local\Appeon\PowerBuilder 19.0. If there are no DbTrace settings in the INI file, the registry settings are used.
Error messages
If the database trace utility cannot open the trace output file with write access, an error message lets you know that the specified trace file could not be created or opened. If the trace utility driver cannot be loaded successfully, a message box informs you that the selected Trace DBMS is not supported in your current installation.
The specific content of the Database Trace log file depends on the database you are accessing and the operations you are performing. However, the log uses the following basic format to display output:
COMMAND: (time)
   {additional_information}
|
Parameter |
Description |
|---|---|
|
COMMAND |
The internal command that PowerBuilder executes to perform the database operation. |
|
time |
The number of microseconds it takes PowerBuilder to perform the database operation. The precision used depends on your operating system's timing mechanism. |
|
additional_information |
(Optional) Additional information about the command. The information provided depends on the database operation. |
Example
The following portion of the log file shows the commands PowerBuilder executes to fetch two rows from a SQL Anywhere database table:
FETCH NEXT: (0.479 MS)
 COLUMN=400
    COLUMN=Marketing
    COLUMN=Evans
FETCH NEXT: (0.001 MS)
 COLUMN=500
    COLUMN=Shipping
    COLUMN=Martinez
If you opt to include DBI Names and Sum Time information in the trace log file, the log for the same two rows might look like this:
FETCH NEXT:(DBI_FETCHNEXT) (1.459 MS / 3858.556 MS)
 COLUMN=400
    COLUMN=Marketing
    COLUMN=Evans
FETCH NEXT:(DBI_FETCHNEXT) (0.001 MS / 3858.557 MS)
 COLUMN=500
    COLUMN=Shipping
    COLUMN=Martinez
For a more complete example of Database Trace output, see Sample Database Trace output.
By default, the Database Trace tool is turned off in PowerBuilder. You can start it in the PowerBuilder development environment or in a PowerBuilder application to trace your database connection.
Turning tracing on and off
To turn tracing on or off you must reconnect. Setting and resetting are not sufficient.
To start the Database Trace tool in the PowerBuilder development environment, edit the database profile for the connection you want to trace, as described in the following procedure.
To start the Database Trace tool by editing a database profile:
-
Open the Database Profile Setup dialog box for the connection you want to trace.
-
On the Connection tab, select the Generate Trace check box and click OK or Apply. (The Generate Trace check box is located on the System tab in the OLE DB Database Profile Setup dialog box.)
The Database Profiles dialog box displays with the name of the edited profile highlighted.
For example, here is the relevant portion of a database profile entry for Adaptive Server 12.5 Test. The setting that starts Database Trace is DBMS:
[Default]     [value not set]
AutoCommit    "FALSE"
Database      "qadata"
DatabasePassword  "00"
DBMS          "TRACE SYC Adaptive Server Enterprise"
DbParm        "Release='12.5'"
Lock          ""
LogId         "qalogin"
LogPassword   "00171717171717"
Prompt        "FALSE"
ServerName    "Host125"
UserID        ""
-
Click Connect in the Database Profiles dialog box to connect to the database.
The Database Trace dialog box displays, indicating that database tracing is enabled. You can enter the file location where PowerBuilder writes the trace output. By default, PowerBuilder writes Database Trace output to a log file named DBTRACE.LOG. You can change the log file name and location in the Database Trace dialog box.
The Database Trace dialog box also lets you select the level of tracing information that you want in the database trace file.
-
Select the types of items you want to include in the trace file and click OK.
PowerBuilder connects to the database and starts tracing the connection.
In a PowerBuilder application that connects to a database, you must specify the required connection parameters in the appropriate script. For example, you might specify them in the script that opens the application.
To trace a database connection in a PowerBuilder script, you specify the name of the DBMS preceded by the word trace and a single space. You can do this by:
-
Copying the PowerScript DBMS trace syntax from the Preview tab in the Database Profile Setup dialog box into your script
-
Coding PowerScript to set a value for the DBMS property of the Transaction object
-
Reading the DBMS value from an external text file
For more about using Transaction objects to communicate with a database in a PowerBuilder application, see the section called “Using Transaction Objects” in Application Techniques.
Copying DBMS trace syntax from the Preview tab
One way to start Database Trace in a PowerBuilder application script is to copy the PowerScript DBMS trace syntax from the Preview tab in the Database Profile Setup dialog box into your script, modifying the default Transaction object name (SQLCA) if necessary.
As you complete the Database Profile Setup dialog box in the development environment, PowerBuilder generates the correct connection syntax on the Preview tab for each selected option, including Generate Trace. Therefore, copying the syntax directly from the Preview tab ensures that it is accurate in your script.
To copy DBMS trace syntax from the Preview tab into your script:
-
On the Connection tab (or System tab in the case of OLE DB) in the Database Profile Setup dialog box for your connection, select the Generate Trace check box to turn on Database Trace.
For instructions, see Starting Database Trace in the development environment.
-
Click Apply to save your changes to the Connection tab without closing the Database Profile Setup dialog box.
-
Click the Preview tab.
The correct PowerScript connection syntax for the Generate Trace and other selected options displays in the Database Connection Syntax box.
-
Select the SQLCA.DBMS line and any other syntax you want to copy to your script and click Copy.
PowerBuilder copies the selected text to the clipboard.
-
Click OK to close the Database Profile Setup dialog box.
-
Paste the selected text from the Preview tab into your script, modifying the default Transaction object name (SQLCA) if necessary.
Coding PowerScript to set a value for the DBMS property
Another way to start the Database Trace tool in a PowerBuilder script is to specify it as part of the DBMS property of the Transaction object. The Transaction object is a special nonvisual object that PowerBuilder uses to communicate with the database. The default Transaction object is named SQLCA, which stands for SQL Communications Area.
SQLCA has 15 properties, 10 of which are used to connect to your database. One of the 10 connection properties is DBMS. The DBMS property contains the name of the database to which you want to connect.
To start the Database Trace tool by specifying the DBMS property:
-
Use the following PowerScript syntax to specify the DBMS property. (This syntax assumes you are using the default Transaction object SQLCA, but you can also define your own Transaction object.)
SQLCA.DBMS = "trace DBMS_name"
For example, the following statements in a PowerBuilder script set the SQLCA properties required to connect to an Adaptive Server database named Test. The keyword trace in the DBMS property indicates that you want to trace the database connection.
SQLCA.DBMS         = "trace SYC"
SQLCA.database     = "Test"
SQLCA.logId        = "Frans"
SQLCA.LogPass      = "xxyyzz"
SQLCA.ServerName   = "Tomlin"
Reading the DBMS value from an external text file or the registry
As an alternative to setting the DBMS property in your PowerBuilder application script, you can use the PowerScript ProfileString function to read the DBMS value from a specified section of an external text file, such as an application-specific initialization file, or from an application settings key in the registry.
The following procedure assumes that the DBMS value read from the database section in your initialization file uses the following syntax to enable database tracing:
DBMS = trace DBMS_name
To start the Database Trace tool by reading the DBMS value from an external text file:
-
Use the following PowerScript syntax to specify the ProfileString function with the DBMS property:
SQLCA.DBMS = ProfileString (file, section, variable, default_value)
For example, the following statement in a PowerBuilder script reads the DBMS value from the [Database] section of the APP.INI file:
SQLCA.DBMS=ProfileString("APP.INI", "Database", "DBMS","")For how to get a value from a registry file instead, see Getting values from the registry.
Instead of tracing all database commands from the start of a database connection, you can start and end a trace programmatically for specific database queries. To start a trace, you can assign the string value pair "PBTrace=1" to the transaction object DBParm property; to end a trace, you assign the string value pair "PBTrace=0".
For example, if you wanted data to be logged to the trace output for a single retrieve command, you could disable tracing from the start of the connection and then surround the retrieve call with DBParm property assignments as follows:
SQLCA.DBMS = "TRACE ODBC"
SQLCA.DBParm="PBTrace=0"
Connect using SQLCA;
...
SQLCA.DBParm="PBTrace=1"
dw_1.Retrieve ( )
SQLCA.DBParm="PBTrace=0"
When you first connect to a database after setting the DBMS parameter to "Trace DBMSName", a configuration dialog box displays. The configuration parameters that you set in this dialog box are saved to the registry. Configuration parameters are retrieved from the registry when you begin tracing by assigning the DBParm parameter to "PBTrace=1".
You can start and stop the SQL statement trace utility in the same way if you set the DBMS value to "TRS DBMSName" instead of "Trace DBMSName". For information about the SQL statement trace utility, see Using the SQL statement trace utility.
Once you start tracing a particular database connection, PowerBuilder continues sending trace output to the log until you do one of the following:
-
Reconnect to the same database with tracing stopped
-
Connect to another database for which you have not enabled tracing
To stop the Database Trace tool by editing a database profile:
-
In the Database Profile Setup dialog box for the database you are tracing, clear the Generate Trace check box on the Connection tab.
-
Click OK in the Database Profile Setup dialog box.
The Database Profiles dialog box displays with the name of the edited profile highlighted.
-
Right-click on the connected database and select Re-connect from the drop-down menu in the Database Profiles dialog box.
PowerBuilder connects to the database and stops tracing the connection.
To stop Database Trace in a PowerBuilder application script, you must delete the word trace from the DBMS property. You can do this by:
-
Editing the value of the DBMS property of the Transaction object
-
Reading the DBMS value from an external text file
You must reconnect for the change to take effect.
To stop Database Trace by editing the DBMS value in a PowerBuilder script:
-
Delete the word trace from the DBMS connection property in your application script.
For example, here is the DBMS connection property in a PowerBuilder script that enables the Database Trace. (This syntax assumes you are using the default Transaction object SQLCA, but you can also define your own Transaction object.)
SQLCA.DBMS = "trace SYC"
Here is how the same DBMS connection property should look after you edit it to stop tracing:
SQLCA.DBMS = "SYC"
Reading the DBMS value from an external text file
As an alternative to editing the DBMS property in your PowerBuilder application script, you can use the PowerScript ProfileString function to read the DBMS value from a specified section of an external text file, such as an application-specific initialization file.
This assumes that the DBMS value read from your initialization file does not include the word trace, as shown in the preceding example in Editing the DBMS property.
PowerBuilder writes the output of the Database Trace tool to a file named DBTRACE.LOG (by default) or to a nondefault log file that you specify. To use the trace log, you can do the following anytime:
-
View the Database Trace log with any text editor
-
Annotate the Database Trace log with your own comments
-
Delete the Database Trace log or clear its contents when it becomes too large
You can display the contents of the log file anytime during a PowerBuilder session.
To view the contents of the log file:
-
Open the log file in one of the following ways:
-
Use the File Editor in PowerBuilder. (For instructions, see the the section called “Using the file editor” in Users Guide.)
-
Use any text editor outside PowerBuilder.
Leaving the log file open
If you leave the log file open as you work in PowerBuilder, the Database Trace tool does not update the log.
When you use the Database Trace log as a troubleshooting tool, it might be helpful to add your own comments or notes to the file. For example, you can specify the date and time of a particular connection, the versions of database server and client software you used, or any other useful information.
To annotate the log file:
-
Open the DBTRACE.LOG file in one of the following ways:
-
Use the File Editor in PowerBuilder. (For instructions, see the the section called “Using the file editor” in Users Guide.)
-
Use any text editor outside PowerBuilder.
-
-
Edit the log file with your comments.
-
Save your changes to the log file.
Each time you connect to a database with tracing enabled, PowerBuilder appends the trace output of your connection to the existing log. As a result, the log file can become very large over time, especially if you frequently enable tracing when connected to a database.
To keep the size of the log file manageable:
-
Do either of the following periodically:
-
Open the log file, clear its contents, and save the empty file.
Provided that you use the default DBTRACE.LOG or the same nondefault file the next time you connect to a database with tracing enabled, PowerBuilder will write to this empty file.
-
Delete the log file.
PowerBuilder will automatically create a new log file the next time you connect to a database with tracing enabled.
This section gives an example of Database Trace output that you might see in the log file and briefly explains each portion of the output.
The example traces a connection with Sum Timing enabled. The output was generated while running a PowerBuilder application that displays information about authors in a publications database. The SELECT statement shown retrieves information from the Author table.
The precision (for example, microseconds) used when Database Trace records internal commands depends on your operating system's timing mechanism. Therefore, the timing precision in your Database Trace log might vary from this example.
Connect to database
CONNECT TO TRACE SYC Adaptive Server Enterprise:
DATABASE=pubs2
LOGID=bob
SERVER=HOST12
DPPARM=Release='12.5.2',StaticBind=0
Prepare SELECT statement
PREPARE:
SELECT  authors.au_id, authors.au_lname, authors.state FROM authors
WHERE ( authors.state not in ( 'CA' ) )
ORDER BY authors.au_lname ASC (3.386 MS / 20.349 MS)
Get column descriptions
DESCRIBE: (0.021 MS / 20.370 MS)
name=au_id,len=12,type=CHAR,pbt=1,dbt=1,ct=0,prec=0,
  scale=0
name=au_lname,len=41,type=CHAR,pbt=1,dbt=1,ct=0,
  prec=0,scale=0
name=state,len=3,type=CHAR,pbt=1,dbt=1,ct=0,prec=0,
  scale=0
Bind memory buffers to columns
BIND SELECT OUTPUT BUFFER (DataWindow):
  (0.007 MS / 20.377 MS)
name=au_id,len=12,type=CHAR,pbt=1,dbt=1,ct=0,prec=0,
  scale=0
name=au_lname,len=41,type=CHAR,pbt=1,dbt=1,ct=0,
  prec=0,scale=0
name=state,len=3,type=CHAR,pbt=1,dbt=1,ct=0,prec=0,
  scale=0
Execute SELECT statement
EXECUTE: (0.001 MS / 20.378 MS)
Fetch rows from result set
FETCH NEXT: (0.028 MS / 20.406 MS)
 au_id=648-92-1872    au_lname=Blotchet-Hall state=OR
FETCH NEXT: (0.012 MS / 20.418 MS)
 au_id=722-51-5454    au_lname=DeFrance    state=IN
...
FETCH NEXT: (0.010 MS / 20.478 MS)
au_id=341-22-1782 au_lname=Smith    state=KS
FETCH NEXT: (0.025 MS / 20.503 MS)
*** DBI_FETCHEND *** (rc 100)
Update and commit database changes
PREPARE:
UPDATE authors SET state = 'NM'
WHERE au_id = '648-92-1872' AND au_lname = 'Blotchet-Halls' AND state = 'OR' (3.284 MS / 23.787 MS)
EXECUTE: (0.001 MS / 23.788 MS)
GET AFFECTED ROWS: (0.001 MS / 23.789 MS)
^ 1 Rows Affected
COMMIT: (1.259 MS / 25.048 MS)
Disconnect from database
DISCONNECT: (0.764 MS / 25.812 MS)
Shut down database interface
SHUTDOWN DATABASE INTERFACE: (0.001 MS / 25.813 MS)
SQL statement tracing
A separate database trace utility lets you add date and time entries to a log file for each SQL statement issued to the database, along with the syntax of the SQL statement. By default, this utility saves all log entries to a file named PBTRSQL.log in the initialization path directory. You can set the initialization path in the on the General tab of the System Options dialog box.
You can also change the log file location and log file name in the registry or in the DbTrace section of the PB.INI file in the same way you change the trace output file name for the main database trace utility (see INI file settings for DBTrace):
[DbTrace]
SqlTraceFile=c:\myApplication\tracesql.log
The registry string for the log file name is SqlTraceFile. It is located under the HKEY_CURRENT_USER\Software\Sybase\PowerBuilder\19.0\DBTrace key. If the DbTrace section in the PB.INI file has at least one entry, the registry value is ignored. The default file name is used only if both the registry value and the PB.INI value are not set.
You start the SQL statement trace utility in PowerScript code by invoking the driver for the DBMS that you want to use with a TRS modifier. You set the driver in the DBMS property of a connection object. For example, for the default SQLCA connection object, if you wanted to use ODBC with SQL tracing, you would code the following:
SQLCA.DBMS="TRS ODBC"
You can start and stop the SQL statement trace utility in PowerScript in the same way you start and stop the main database utility: you can start trace logging by setting the DBParm parameter to "PBTrace=1" and you can stop trace logging by setting the parameter to "PBTrace=0".
For more information, see Starting a trace in PowerScript with the PBTrace parameter.
Server-side timestamps
Server-side timestamps can be used instead of client-side timestamps if the connecting PowerBuilder database driver supports the DBI_GET_SERVER_TIME command type. Currently, server-side timestamps are available for the ASE, SYC, and ODBC drivers.
PBTRS.dll obtains the date and time from the server only once during the database connection processing. Each time a new timestamp needs to be generated, it determines the number of milliseconds that have transpired since the connection was established and computes the new server-side date and time by adding the elapsed interval to the initial connection timestamp obtained from the server.
Log file headers
Output to the log file is always appended. For ease of reading, the PBTRS.dll produces a banner inside the log file each time a new database connection is established. The banner lists the date and time of the database connection using the system clock on the client workstation. The DBParms for the database connection are listed immediately under the banner. If a server timestamp is used for subsequent entries in the log file, the statement "Using timestamp from DBMS server" is entered immediately under the DBParm listings.
When you are running an application with a database trace utility, one of the DBParm values should include the DisableBind parameter. You should set DisableBind to 1. Otherwise the syntax that is logged in the trace output file will contain parameter markers instead of human-readable values.
The following output shows a banner from a trace file that uses a client-side timestamp in the banner itself, and server-side timestamps elsewhere:
/*---------------------------------------------------*/
/*                 1/10/2007  16:08                  */
/*---------------------------------------------------*/
(60ec068): CONNECT TO TRS ODBC:  DBPARM=ConnectString='DSN= PB Demo DB V2019R3;UID=dba;PWD=sql' SERVER=DemoDatabase190
(60ec068): Using timestamp from DBMS server. (1/10/2007 16:08:28.079)
(60ec068): PREPARE: (1/10/2007 16:08:44.513) SELECT DISTINCT "pbcattbl"."pbt_tnam", "pbcattbl"."pbt_cmnt" FROM "pbcattbl" ORDER BY "pbcattbl"."pbt_tnam" ASC
This section describes how to use the ODBC Driver Manager Trace tool.
You can use the ODBC Driver Manager Trace tool to trace a connection to any ODBC data source that you access in PowerBuilder through the ODBC interface.
Unlike the Database Trace tool, the ODBC Driver Manager Trace tool cannot trace connections through one of the native database interfaces.
What this tool does
ODBC Driver Manager Trace records information about ODBC API calls (such as SQLDriverConnect, SQLGetInfo, and SQLFetch) made by PowerBuilder while connected to an ODBC data source. It writes this information to a default log file named SQL.LOG or to a log file that you specify.
What both tools do
The information from ODBC Driver Manager Trace, like Database Trace, can help you:
-
Understand what PowerBuilder is doing internally while connected to an ODBC data source
-
Identify and resolve problems with your ODBC connection
-
Provide useful information to Technical Support if you call them for help with your database connection
When to use this tool
Use ODBC Driver Manager Trace instead of the Database Trace tool if you want more detailed information about the ODBC API calls made by PowerBuilder.
Performance considerations
Turning on ODBC Driver Manager Trace can slow your performance while working in PowerBuilder. Therefore, use ODBC Driver Manager Trace for debugging purposes only and keep it turned off when you are not debugging.
SQL.LOG file
PowerBuilder writes ODBC Driver Manager Trace output to a default log file named SQL.LOG or to a log file that you specify. The default location of SQL.LOG is in your root directory.
By default, ODBC Driver Manager Trace is turned off in PowerBuilder. You can start it in order to trace your ODBC connection in two ways:
-
Edit your database profile in the PowerBuilder development environment
-
Edit a script in a PowerBuilder application
To start ODBC Driver Manager Trace in the PowerBuilder development environment, edit the database profile for the connection you want to trace, as described in the following procedure.
To start ODBC Driver Manager Trace by editing the database profile:
-
Open the Database Profile Setup-ODBC dialog box for the ODBC connection you want to trace.
-
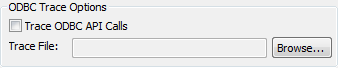
On the Options tab, select the Trace ODBC API Calls check box.
-
(Optional) To specify a log file where you want PowerBuilder to write the output of ODBC Driver Manager Trace, type the path name in the Trace File box
or
(Optional) Click Browse to display the pathname of an existing log file in the Trace File box.
By default, if the Trace ODBC API Calls check box is selected and no trace file is specified, PowerBuilder sends ODBC Driver Manager Trace output to the default SQL.LOG file.
-
Click OK or Apply
or
Right-click on the connected database and select Re-connect from the drop-down menu in the Database Profiles dialog box.
The Database Profiles dialog box displays with the name of the edited profile highlighted.
PowerBuilder saves your settings in the database profile entry in the registry in the HKEY_CURRENT_USER\Software\Sybase\19.0\DatabaseProfiles key.
For example, here is the relevant portion of a database profile entry for an ODBC data source named Employee. The settings that start ODBC Driver Manager Trace (corresponding to the ConnectOption DBParm parameter) are emphasized.
DBMS     "ODBC"
...
DbParm   "ConnectString='DSN=Emloyee;UID=dba;
PWD=00c61737',ConnectOption='SQL_OPT_TRACE,SQL_OPT_TRACE_ON;SQL_OPT_TRACEFILE,C:\Temp\odbctrce.log'
-
Click Connect in the Database Profiles dialog box to connect to the database
or
Right-click on the connected database and select Re-connect from the drop-down menu in the Database Profiles dialog box.
PowerBuilder connects to the database, starts tracing the ODBC connection, and writes output to the log file you specified.
To start ODBC Driver Manager Trace in a PowerBuilder application, you must specify certain values for the ConnectOption DBParm parameter in the appropriate script. For example, you might include them in the script that opens the application.
You can specify the required ConnectOption values in a PowerBuilder script by:
-
(Recommended) Copying the PowerScript ConnectOption DBParm syntax from the Preview tab in the Database Profile Setup dialog box into your script
-
Coding PowerScript to set a value for the DBParm property of the Transaction object
-
Reading the DBParm values from an external text file
For more about using Transaction objects to communicate with a database in a PowerBuilder application, see the section called “Using Transaction Objects” in Application Techniques.
About the ConnectOption DBParm parameter
ConnectOption includes several parameters, two of which control the operation of ODBC Driver Manager Trace for any ODBC-compatible driver you are using in PowerBuilder.
|
Parameter |
Description |
|---|---|
|
SQL_OPT_TRACE |
Purpose Starts or stops ODBC Driver Manager Trace in PowerBuilder. Values The values you can specify are:
|
|
SQL_OPT_TRACEFILE |
Purpose Specifies the name of the trace file where you want to send the output of ODBC Driver Manager Trace. PowerBuilder appends the output to the trace file you specify until you stop the trace. To display the trace file, you can use the File Editor (in PowerBuilder) or any text editor (outside PowerBuilder). Values You can specify any filename for the trace file, following the naming conventions of your operating system. By default, if tracing is on and you have not specified a trace file, PowerBuilder sends ODBC Driver Manager Trace output to a file named SQL.LOG. For information about the location of SQL.LOG on different platforms, see About ODBC Driver Manager Trace. |
Copying ConnectOption syntax from the Preview tab
The easiest way to start ODBC Driver Manager Trace in a PowerBuilder application script is to copy the PowerScript ConnectString DBParm syntax from the Preview tab in the Database Profile Setup - ODBC dialog box into your script, modifying the default Transaction object name (SQLCA) if necessary.
As you complete the Database Profile Setup dialog box in the development environment, PowerBuilder generates the correct connection syntax on the Preview tab. Therefore, copying the syntax directly from the Preview tab into your script ensures that it is accurate.
To copy ConnectOption syntax from the Preview tab into your script:
-
On the Options tab in the Database Profile Setup - ODBC dialog box for your connection, select the Trace ODBC API Calls check box and (optionally) specify a log file in the Trace File box to start ODBC Driver Manager Trace.
-
Click Apply to save your changes to the Options tab without closing the dialog box.
-
Click the Preview tab.
The correct PowerScript syntax for ODBC Driver Manager Trace and other selected options displays in the Database Connection Syntax box.
The following example shows the PowerScript syntax that starts ODBC Driver Manager Trace and sends output to the file C:\TEMP\ODBCTRCE.LOG.
// Profile Employee
SQLCA.DBMS = "ODBC"
SQLCA.AutoCommit = False
SQLCA.DBParm = "Connectstring='DSN=Employee',
   ConnectOption='SQL_OPT_TRACE,SQL_OPT_TRACE_ON;
   SQL_OPT_TRACEFILE,c:\temp\odbctrce.log'"
-
Select the SQLCA.DBParm line and any other syntax you want to copy to your script and click Copy.
PowerBuilder copies the selected text to the clipboard.
-
Paste the selected text from the Preview tab into your script, modifying the default Transaction object name (SQLCA) if necessary.
Coding PowerScript to set a value for the DBParm property
Another way to start ODBC Driver Manager Trace in a PowerBuilder application script is to include the ConnectOption parameters that control tracing as values for the DBParm property of the Transaction object.
To start ODBC Driver Manager Trace by setting the DBParm property:
-
In your application script, set the SQL_OPT_TRACE and (optionally) SQL_OPT_TRACEFILE ConnectOption parameters to start the trace and to specify a nondefault trace file, respectively.
For example, the following statement starts ODBC Driver Manager Trace in your application and sends output to a file named MYTRACE.LOG. Insert a comma to separate the ConnectString and ConnectOption values.
This example assumes you are using the default Transaction object SQLCA, but you can also define your own Transaction object.
SQLCA.DBParm="ConnectString='DSN=Test;UID=PB;
   PWD=xyz',ConnectOption='SQL_OPT_TRACE,
   SQL_OPT_TRACE_ON;SQL_OPT_TRACEFILE,C:\TRC.LOG'"
Reading the DBParm value from an external text file
As an alternative to setting the DBParm property in your PowerBuilder application script, you can use the PowerScript ProfileString function to read DBParm values from a specified section of an external text file, such as an application-specific initialization file.
This assumes that the DBParm value read from your initialization file includes the ConnectOption parameter to start ODBC Driver Manager Trace, as shown in the preceding example.
To start ODBC Driver Manager Trace by reading DBParm values from an external text file:
-
Use the following PowerScript syntax to specify the ProfileString function with the DBParm property:
SQLCA.dbParm = ProfileString (file, section, variable, default_value)
For example, the following statement in a PowerBuilder script reads the DBParm values from the [Database] section of the APP.INI file:
SQLCA.dbParm = ProfileString("APP.INI","Database","DBParm","")
Once you start tracing an ODBC connection with ODBC Driver Manager Trace, PowerBuilder continues sending trace output to the log file until you stop tracing. After you stop tracing as described in the following sections, you must reconnect to have the changes take effect.
To stop ODBC Driver Manager Trace by editing a database profile:
-
Open the Database Profile Setup - ODBC dialog box for the connection you are tracing.
For instructions, see Starting ODBC Driver Manager Trace.
-
On the Options tab, clear the Trace ODBC API Calls check box.
If you supplied the pathname of a log file in the Trace File box, you can leave it specified in case you want to restart tracing later.
-
Click OK in the Database Profile Setup - ODBC dialog box.
The Database Profiles dialog box displays, with the name of the edited profile highlighted.
-
Click Connect in the Database Profiles dialog box or right-click on the connected database and select Re-connect from the drop-down menu in the Database Profiles dialog box.
PowerBuilder connects to the database and stops tracing the connection.
To stop ODBC Driver Manager Trace in a PowerBuilder application script, you must change the SQL_OPT_TRACE ConnectOption parameter to SQL_OPT_TRACE_OFF. You can do this by:
-
Editing the value of the DBParm property of the Transaction object
-
Reading the DBParm values from an external text file
Editing the DBParm property
One way to change the ConnectOption value in a PowerBuilder script is to edit the DBParm property of the Transaction object.
To stop ODBC Driver Manager Trace by editing the DBParm property:
-
In your application script, edit the DBParm property of the Transaction object to change the value of the SQL_OPT_TRACE ConnectOption parameter to SQL_OPT_TRACE_OFF.
For example, the following statement starts ODBC Driver Manager Trace in your application and sends the output to a file named MYTRACE.LOG. (This example assumes you are using the default Transaction object SQLCA, but you can also define your own Transaction object.)
SQLCA.DBParm="ConnectString='DSN=Test;UID=PB;
   PWD=xyz',ConnectOption='SQL_OPT_TRACE,
   SQL_OPT_TRACE_ON;SQL_OPT_TRACEFILE,C:\TRC.LOG'"
Here is how the same statement should look after you edit it to stop ODBC Driver Manager Trace. (You can leave the name of the trace file specified in case you want to restart tracing later.)
SQLCA.DBParm="ConnectString='DSN=Test;UID=PB;
   PWD=xyz',ConnectOption='SQL_OPT_TRACE,
   SQL_OPT_TRACE_OFF;SQL_OPT_TRACEFILE,C:\TRC.LOG'"
Reading DBParm values
As an alternative to editing the DBParm property in your PowerBuilder application script, you can use the PowerScript ProfileString function to read DBParm values from a specified section of an external text file, such as an application-specific initialization file.
This assumes that the DBParm value read from your initialization file sets the value of SQL_OPT_TRACE to SQL_OPT_TRACE_OFF, as shown in the preceding example.
You can display the contents of the ODBC Driver Manager Trace log file anytime during a PowerBuilder session.
Location of SQL.LOG
For information about where to find the default SQL.LOG file, see About ODBC Driver Manager Trace.
To view the contents of the log file:
-
Open SQL.LOG or the log file you specified in one of the following ways:
-
Use the File Editor in PowerBuilder. (For instructions, see the the section called “Using the file editor” in Users Guide.)
-
Use any text editor outside PowerBuilder.
Leaving the log file open
If you leave the log file open as you work in PowerBuilder, ODBC Driver Manager Trace does not update it.
This section shows a partial example of output from ODBC Driver Manager Trace to give you an idea of the information it provides. The example is part of the trace on an ODBC connection to the Demo Database.
For more about a particular ODBC API call, see your ODBC documentation.
PB125 179:192   EXIT  SQLSetConnectOption  with return code 0 (SQL_SUCCESS)
      HDBC 0x036e1300
      UWORD    104 <SQL_OPT_TRACE>
      UDWORD 1

PB125 179:192   EXIT  SQLGetInfoW  with return code 0 (SQL_SUCCESS)
      HDBC 0x036e1300
      UWORD 25 <SQL_DATA_SOURCE_READ_ONLY>
      PTR 0x036e3c88 [       2] "N"
      SWORD 512
      SWORD * 0x0012cc32 (2)
This section describes how to use the JDBC Driver Manager Trace tool.
You can use the JDBC Driver Manager Trace tool to trace a connection to any database that you access in PowerBuilder through the JDBC interface.
Unlike the Database Trace tool, the JDBC Driver Manager Trace tool cannot trace connections through one of the native database interfaces.
What this tool does
JDBC Driver Manager Trace logs errors and informational messages originating from the Driver object currently loaded (such as SAP's jConnect JDBC driver) when PowerBuilder connects to a database through the JDBC interface. It writes this information to a default log file named JDBC.LOG or to a log file that you specify. The amount of trace output varies depending on the JDBC driver being used.
What both tools do
The information from JDBC Driver Manager Trace, like Database Trace, can help you:
-
Understand what PowerBuilder is doing internally while connected to a database through the JDBC interface
-
Identify and resolve problems with your JDBC connection
-
Provide useful information to Technical Support if you call them for help with your database connection
When to use this tool
Use JDBC Driver Manager Trace instead of the Database Trace tool if you want more detailed information about the JDBC driver.
Performance considerations
Turning on JDBC Driver Manager Trace can slow your performance while working in PowerBuilder. Therefore, use JDBC Driver Manager Trace for debugging purposes only and keep it turned off when you are not debugging.
JDBC.LOG file
PowerBuilder writes JDBC Driver Manager Trace output to a default log file named JDBC.LOG or to a log file that you specify. The default location of JDBC.LOG is a temp directory.
By default, JDBC Driver Manager Trace is turned off in PowerBuilder. You can start it in order to trace your JDBC connection in two ways:
-
Edit your database profile in the PowerBuilder development environment
-
Edit a script in a PowerBuilder application
To start JDBC Driver Manager Trace in the PowerBuilder development environment, edit the database profile for the connection you want to trace, as described in the following procedure.
To start JDBC Driver Manager Trace by editing the database profile:
-
Open the Database Profile Setup - JDBC dialog box for the JDB connection you want to trace.
-
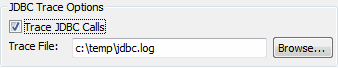
On the Options tab, select the Trace JDBC Calls check box.
-
(Optional) To specify a log file where you want PowerBuilder to write the output of JDBC Driver Manager Trace, type the path name in the Trace File box, or click Browse to display the path name of an existing log file in the Trace File box.
By default, if the Trace JDBC Calls check box is selected and no alternative trace file is specified, PowerBuilder sends JDBC Driver Manager Trace output to the default JDBC.LOG file.
-
Click OK or Apply.
The Database Profiles dialog box displays with the name of the edited profile highlighted. PowerBuilder saves your settings in the database profile entry in the registry.
For example, here are the DBMS and DBParm string values of a database profile entry for a database named Employee. The settings that start JDBC Driver Manager Trace (corresponding to the TraceFile DBParm parameter) are emphasized.
DBMS "TRACE JDBC" DbParm "Driver='com.sybase.jdbc3.jdbc.SybDriver', URL='jdbc:sybase:Tds:199.93.178.151: 5007/tsdata',TraceFile='c:\temp\jdbc.log'" -
Click Connect in the Database Profiles dialog box to connect to the database
or
Right-click on the connected database and select Re-connect from the drop-down menu in the Database Profiles dialog box.
PowerBuilder connects to the database, starts tracing the JDBC connection, and writes output to the log file you specified.
To start JDBC Driver Manager Trace in a PowerBuilder application, you must specify the TraceFile DBParm parameter in the appropriate script. For example, you might include it in the script that opens the application.
You can specify the TraceFile parameter in a PowerBuilder script by:
-
(Recommended) Copying the PowerScript TraceFile DBParm syntax from the Preview tab in the Database Profile Setup dialog box into your script
-
Coding PowerScript to set a value for the DBParm property of the Transaction object
-
Reading the DBParm values from an external text file
For more about using Transaction objects to communicate with a database in a PowerBuilder application, see the section called “Using Transaction Objects” in Application Techniques.
About the TraceFile DBParm parameter
TraceFile controls the operation of JDBC Driver Manager Trace for any JDBC-compatible driver you are using in PowerBuilder.
Copying TraceFile syntax from the Preview tab
The easiest way to start JDBC Driver Manager Trace in a PowerBuilder application script is to copy the PowerScript TraceFile DBParm syntax from the Preview tab in the Database Profile Setup - JDBC dialog box into your script, modifying the default Transaction object name (SQLCA) if necessary.
As you complete the Database Profile Setup dialog box in the development environment, PowerBuilder generates the correct connection syntax on the Preview tab. Therefore, copying the syntax directly from the Preview tab into your script ensures that it is accurate.
To copy TraceFile syntax from the Preview tab into your script:
-
On the Options tab in the Database Profile Setup - JDBC dialog box for your connection, select the Trace JDBC Calls check box and (optionally) specify a log file in the Trace File box to start JDBC Driver Manager Trace.
For instructions, see Stopping JDBC Driver Manager Trace in the development environment.
-
Click Apply to save your changes to the Options tab without closing the dialog box.
-
Click the Preview tab.
The correct PowerScript syntax for JDBC Driver Manager Trace and other selected options displays in the Database Connection Syntax box.
The following example shows the PowerScript syntax that starts JDBC Driver Manager Trace and sends output to the file C:\TEMP\JDBC.LOG.
// Profile Employee
SQLCA.DBMS = "TRACE JDBC"
SQLCA.DBParm = "Driver='com.sybase.jdbc3.jdbc.SybDriver',
URL='jdbc:sybase:Tds:199.93.178.151:5007/tsdata',
TraceFile='c:\temp\jdbc.log'"
-
Select the DBParm line and any other syntax you want to copy to your script and click Copy.
PowerBuilder copies the selected text to the clipboard.
-
Paste the selected text from the Preview tab into your script, modifying the default Transaction object name (SQLCA) if necessary.
Coding PowerScript to set a value for the DBParm property
Another way to start JDBC Driver Manager Trace in a PowerBuilder application script is to include the TraceFile parameter as a value for the DBParm property of the Transaction object.
To start JDBC Driver Manager Trace by setting the DBParm property:
-
In your application script, include the TraceFile parameter to start the trace and specify a nondefault trace file.
For example, this statement starts JDBC Driver Manager Trace in your application and sends output to a file named MYTRACE.LOG. (This example assumes you are using the default Transaction object SQLCA, but you can also define your own Transaction object.)
SQLCA.DBParm = "Driver='com.sybase.jdbc3.jdbc.SybDriver',
URL='jdbc:sybase:Tds:199.93.178.151:5007/tsdata',
TraceFile='c:\MYTRACE.LOG'"
Reading the DBParm value from an external text file
As an alternative to setting the DBParm property in your PowerBuilder application script, you can use the PowerScript ProfileString function to read DBParm values from a specified section of an external text file, such as an application-specific initialization file.
This assumes that the DBParm value read from your initialization file includes the TraceFile parameter to start JDBC Driver Manager Trace, as shown in the preceding example.
To start JDBC Driver Manager Trace by reading DBParm values from an external text file:
-
Use the following PowerScript syntax to specify the ProfileString function with the DBParm property:
SQLCA.dbParm = ProfileString (file, section, variable, default_value)
For example, the following statement in a PowerBuilder script reads the DBParm values from the [Database] section of the APP.INI file:
SQLCA.dbParm = ProfileString("APP.INI","Database","DBParm","")
Once you start tracing a JDBC connection with JDBC Driver Manager Trace, PowerBuilder continues sending trace output to the log file until you stop tracing.
To stop JDBC Driver Manager Trace by editing a database profile:
-
Open the Database Profile Setup - JDBC dialog box for the connection you are tracing.
For instructions, see Starting JDBC Driver Manager Trace.
-
On the Options tab, clear the Trace JDBC Calls check box.
If you supplied the path name of a log file in the Trace File box, you can leave it specified in case you want to restart tracing later.
-
Click OK in the Database Profile Setup - JDBC dialog box.
The Database Profiles dialog box displays, with the name of the edited profile highlighted.
-
Click Connect in the Database Profiles dialog box or right click on the connected database and select Re-connect from the drop-down menu in the Database Profiles dialog box.
PowerBuilder connects to the database and stops tracing the connection.
To stop JDBC Driver Manager Trace in a PowerBuilder application script, you must delete the TraceFile parameter. You can do this by:
-
Editing the value of the DBParm property of the Transaction object
-
Reading the DBParm values from an external text file
Editing the DBParm property
One way to change the TraceFile parameter in a PowerBuilder script is to edit the DBParm property of the Transaction object.
To stop JDBC Driver Manager Trace by editing the DBParm property:
-
In your application script, edit the DBParm property of the Transaction object to delete the TraceFile parameter.
For example, the following statement starts JDBC Driver Manager Trace in your application and sends the output to a file named MYTRACE.LOG. (This example assumes you are using the default Transaction object SQLCA, but you can also define your own Transaction object.)
SQLCA.DBParm = "Driver='com.sybase.jdbc3.jdbc.SybDriver',
URL='jdbc:sybase:Tds:199.93.178.151:5007/tsdata',
TraceFile='c:\MYTRACE.LOG'"
Here is how the same statement should look after you edit it to stop JDBC Driver Manager Trace.
SQLCA.DBParm = "Driver='com.sybase.jdbc3.jdbc.SybDriver',
URL='jdbc:sybase:Tds:199.93.178.151:5007/tsdata'"
Reading DBParm values
As an alternative to editing the DBParm property in your PowerBuilder application script, you can use the PowerScript ProfileString function to read DBParm values from a specified section of an external text file, such as an application-specific initialization file, or you can use RegistryGet to obtain values from a registry key.
This assumes that the DBParm is no longer read from your initialization file or registry key, as shown in the preceding example. You must disconnect and reconnect for this to take effect.
You can display the contents of the JDBC Driver Manager Trace log file anytime during a PowerBuilder session.
Location of JDBC.LOG
For information about where to find the default JDBC.LOG file, see About JDBC Driver Manager Trace.
To view the contents of the log file:
-
Open JDBC.LOG or the log file you specified in one of the following ways:
-
Use the File Editor in PowerBuilder. (For instructions, see the the section called “Using the file editor” in Users Guide.)
-
Use any text editor outside PowerBuilder.
Leaving the log file open
If you leave the log file open as you work in PowerBuilder, JDBC Driver Manager Trace does not update the log.
