Step 1: Prepare a machine that meets the following requirements and make sure it has Internet access.
The machine must be installed with the following software and hardware configurations:
-
Windows 7/8/10 (32-bit or 64-bit) or Mac OS X 10.10 thru 10.14
-
4 GB RAM minimum
-
2 GB of available disk space minimum
Step 2: Download the latest version of Android Studio, and then install Android Studio. The machine must have Internet access to complete the installation.
By the time of writing this document, the current version of Android Studio requires SDK 30 or higher and Gradle 6.8.3 or higher.
Step 3: Open the Android project generated in Task 1: from Android Studio, select the project folder to load the entire project.
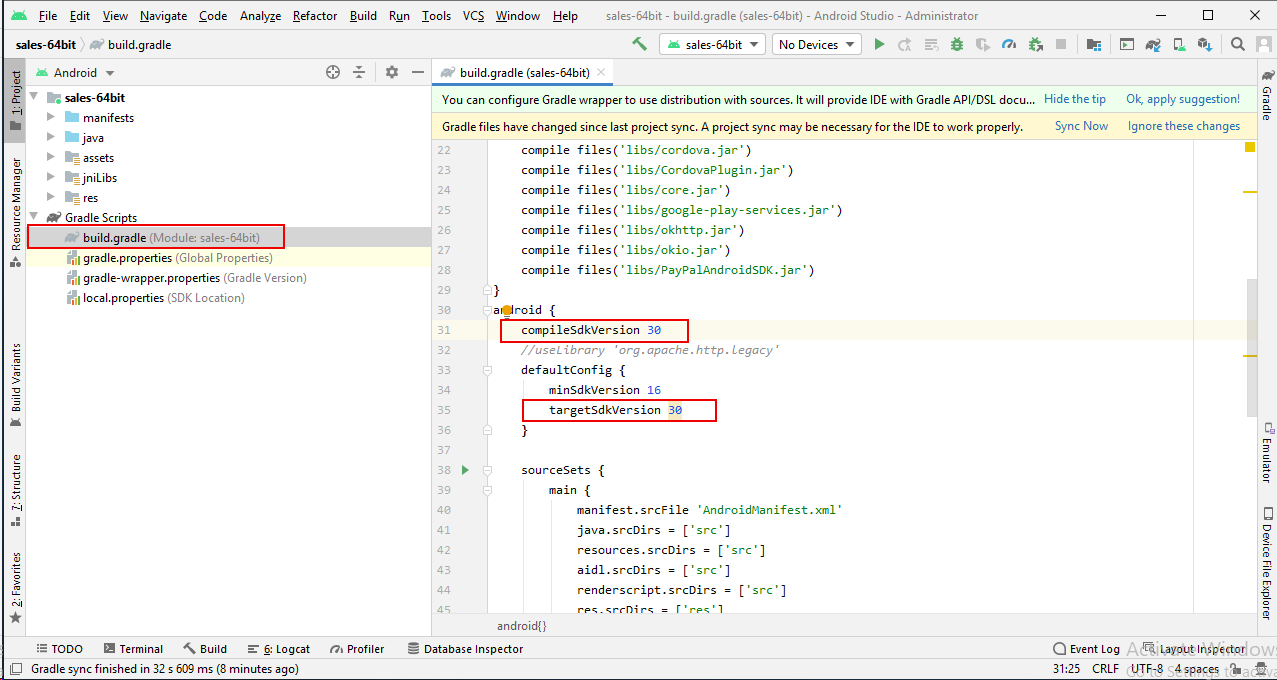
Step 4: In Android Studio, open the build.gradle file and get the required version for SDK.
Step 5: Select Tools | SDK Manager from the menu, and then install the required SDK and build tools.
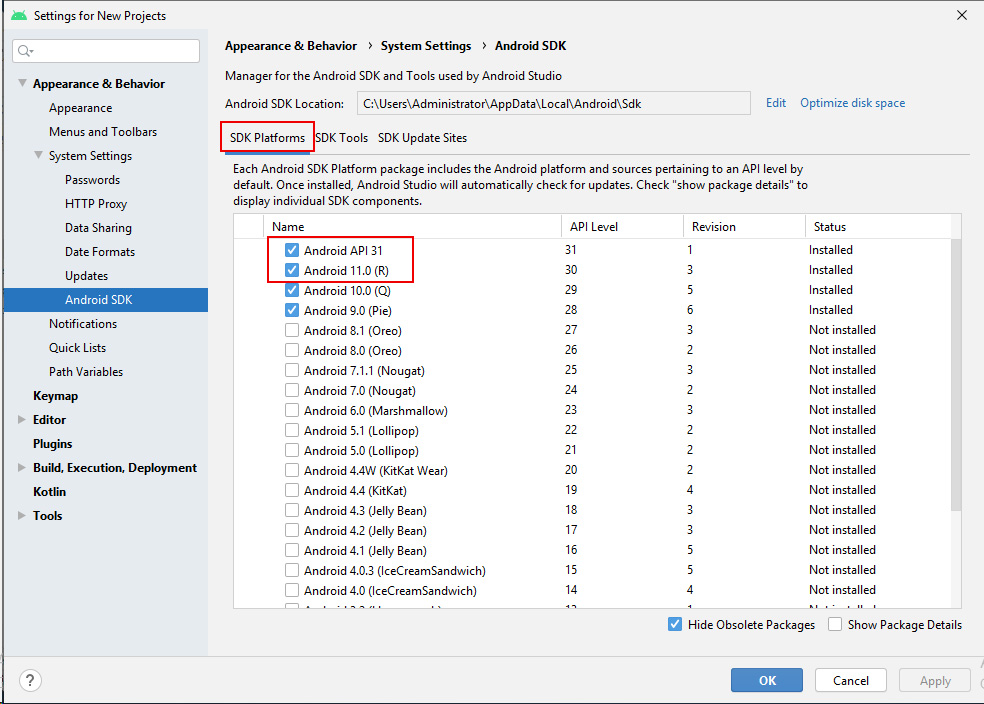
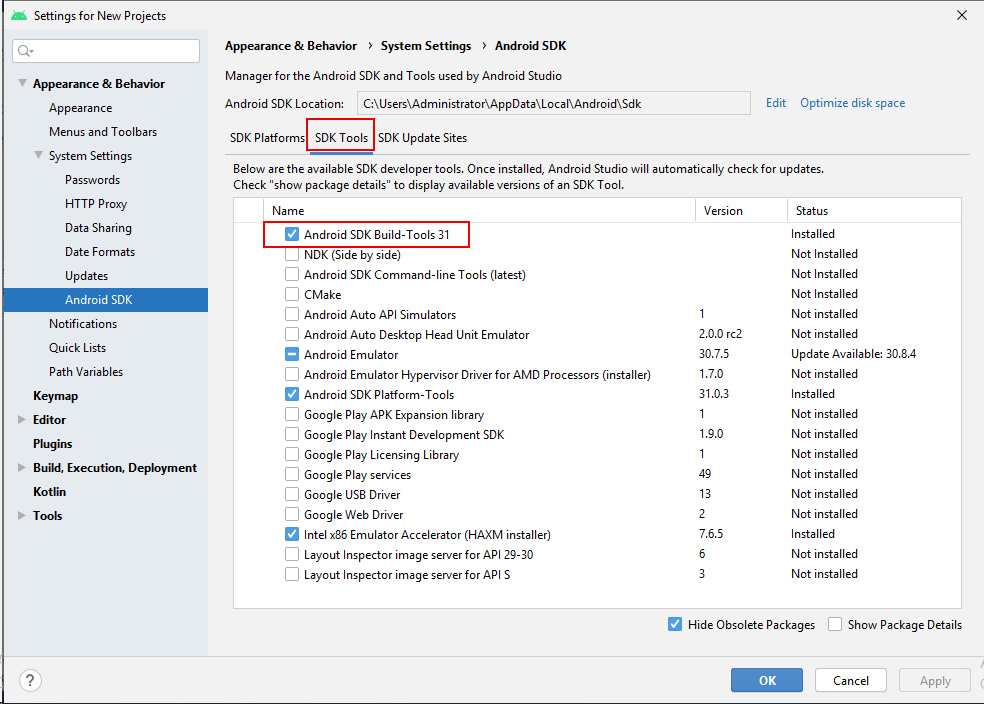
Click OK to begin install.
Step 6: Configure the version of the Android Gradle plugin and the Gradle accordingly.
For example, the following lines set the plugin to version 3.5.3 in the build.gradle file:
dependencies {
  classpath 'com.android.tools.build:gradle:3.5.3'
}
The following line sets the Gradle to version 6.8.3 in the gradle-wrapper.properties file:
...
distributionUrl=https\://services.gradle.org/distributions/gradle-6.8.3-all.zip
...
Step 7: Select the build type (debug or release) in the Build Variants window (to open the Build Variants window, select View | Tool Windows | Build Variants from the menu.

Step 8: Build the AAB or APK file by selecting Build | Build Bundle(s) / APK(s) | Build Bundle(s) or Build APK(s) from the menu.
Make sure the machine has Internet access during the build process.
You can find the AAB or APK file generated under the Build > Outputs > AAB or APK folder in the Project view.
