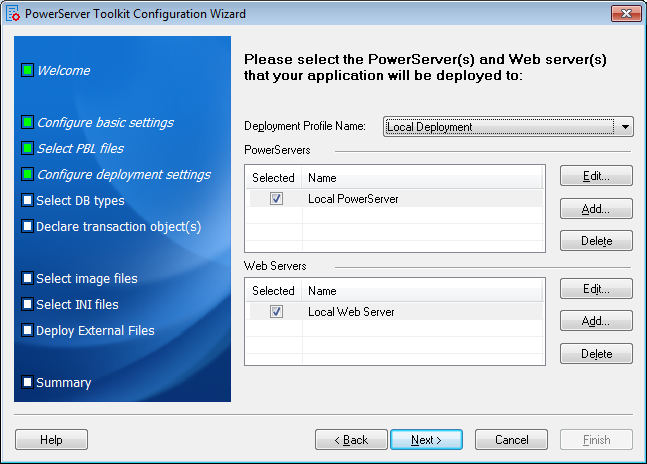
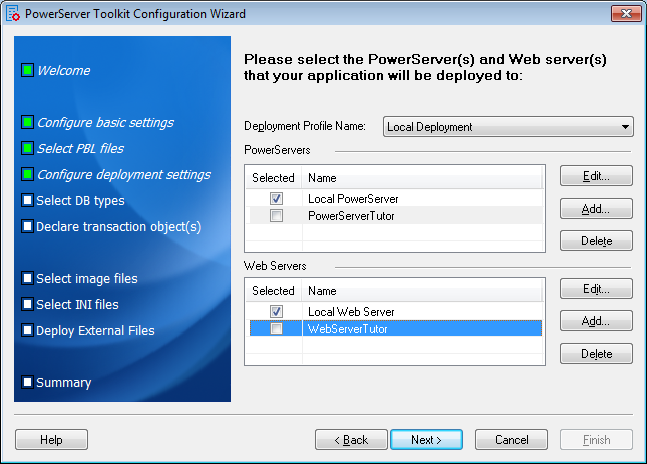
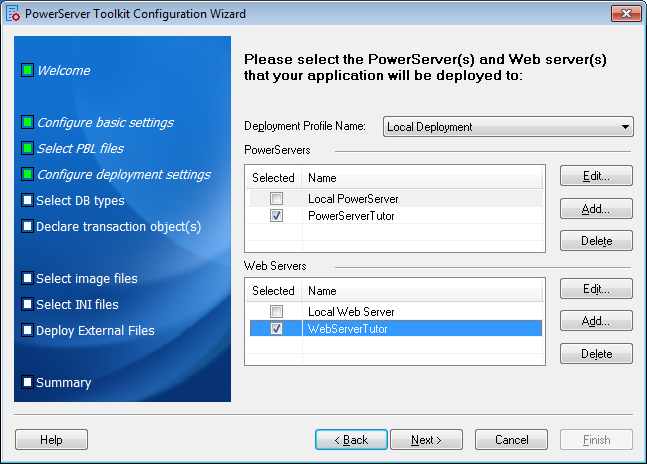
The deployment settings associate the PowerServer(s) and Web server(s) as a group used for application deployment. In this tutorial, the deployment profile will associate PowerServerTutor and WebServerTutor.
In this section, you will learn:
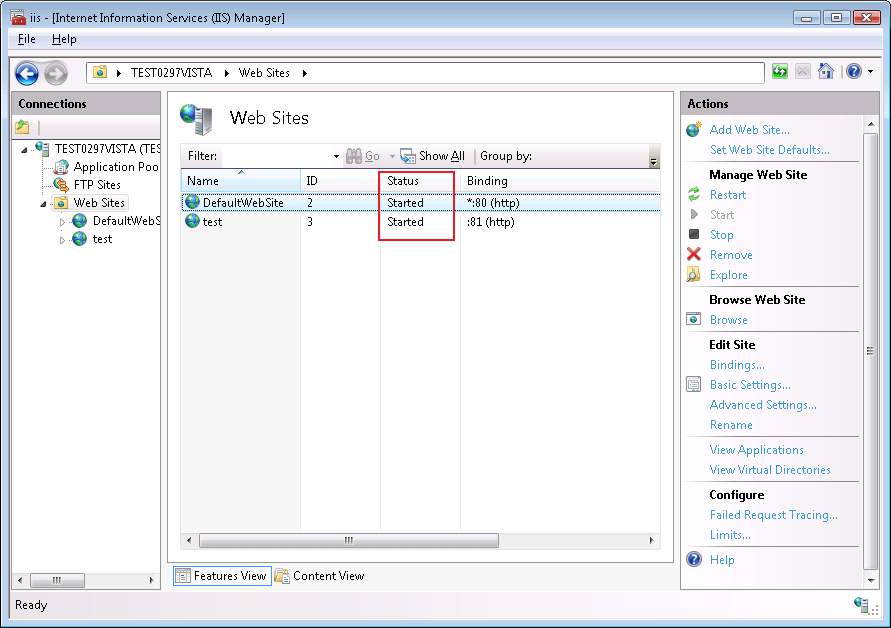
When adding the PowerServer profile and Web server profile, you need to verify the connection to the PowerServer and the Web server; therefore, you should start them before configuration. If you want to start PowerServer installed to WebLogic, WebSphere, JBoss, or JEUS, refer to Installation Guide for Appeon PowerServer for detailed instructions. In this tutorial, IIS will be used as both the PowerServer and the Web server. Therefore, you only need to start IIS. Refer to the following steps for how to start the IIS/PowerServer.
Select Windows Start > Programs > Appeon > PowerBuilder 2017 R3 >PowerServer > IIS Manager.
Make sure that the Web Site where PowerServer is installed is started, as shown in the following figure. If not, please select the name listed on the Web Site page and click Start on the Actions pane to start it. If it is started, the Start menu will be grayed out. The following figure indicates that PowerServer and Web server are ready for use.
Each PowerServer profile contains settings of a PowerServer/application server used by the Appeon deployment.
To add the PowerServer profile for the deployment of the tutorial application:
Step 1: Click the Add button in the PowerServer group box.
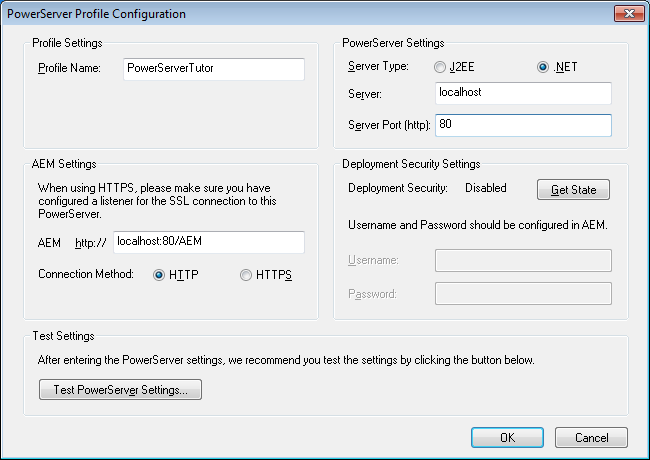
The PowerServer Profile Configuration dialog box appears.
The following table lists instructions for how to specify the properties for a PowerServer profile.
Table 16. Instructions for creating a PowerServer profile
|
Property |
Instructions |
|---|---|
|
Profile Name |
Input "PowerServerTutor" as the name of the PowerServer profile. |
|
Server Type |
Make sure that .NET is selected. If PowerServer is installed to WebLogic, WebSphere, JBoss, or JEUS, then select "J2EE". |
|
Server |
Input "localhost". To deploy to a remote PowerServer, enter the IP address or machine name of the remote server. |
|
Server Port (http) |
Input "80". If PowerServer is installed to WebLogic, input "7001"; if installed to WebSphere, input "9080"; if installed to JEUS, input "8088"; if installed to JBoss, input "8080". To deploy to a remote PowerServer, enter the HTTP port of the remote server. |
|
AEM URL |
The URL for AEM will be automatically generated after Server and Server Port are specified. |
|
Connection method |
Leave it as default. |
|
Deployment Security |
Leave it as default. |
|
Username |
Leave it as default. |
|
Password |
Leave it as default. |
For detailed instructions about these settings, refer to the section called “PowerServer profile settings” in PowerServer Toolkit User Guide.
Step 2: Click Test PowerServer Settings.
PowerServer Toolkit will try to connect to PowerServer with the parameters you specified. Make sure the test is successful before you continue.
Step 3: Click OK.
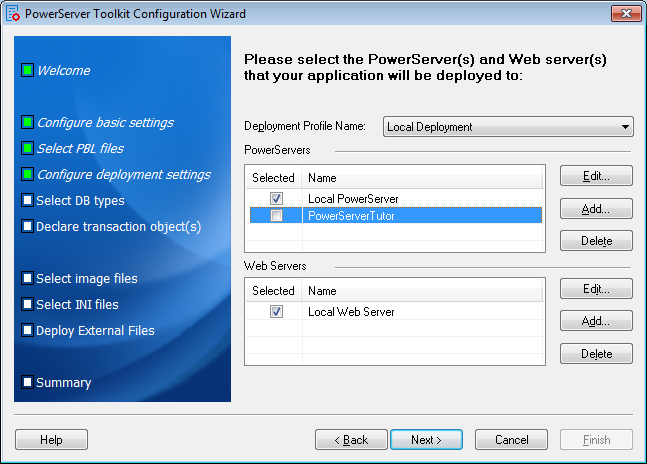
PowerServerTutor is added to the PowerServers list.
Each Web server profile contains settings of a Web server used by the Appeon deployment.
Since IIS will be used for the deployment of the Appeon tutorial PowerBuilder application, you need not to start it because IIS/PowerServer is already running.
To add the Web server profile for the deployment of the tutorial application:
Step 1: Click the Add button in the Web Servers group box.
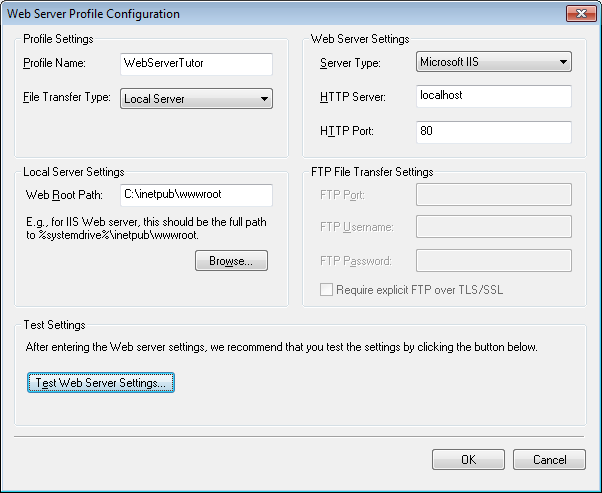
The Web Server Profile Configuration dialog box appears.
The following table lists instructions for how to specify the properties for a Web server profile.
Table 17. Instructions for creating a Web Server profile
|
Property |
Instructions |
|---|---|
|
Profile Name |
Input "WebServerTutor" as the name of the Web Server profile. |
|
File Transfer Type |
Select Local Server. To deploy to a remote Web Server, select Remote Server, and then specify the FTP Port, FTP Username and FTP Password of the remote server. |
|
Server Type |
Select Microsoft IIS. If using WebLogic HTTP server, select WebLogic; if using WebSphere HTTP server, select WebSphere; if using JEUS HTTP server, select JEUS; if using JBoss HTTP server, select JBoss. |
|
HTTP Server |
Input "localhost". To deploy to a remote Web Server, enter the IP address or machine name of the remote server. |
|
HTTP Port |
Input "80". If PowerServer is installed to WebLogic, then input "7001"; if installed to WebSphere, then input "9080"; if installed to JEUS, then input "8088"; if installed to JBoss, then input "8080". To deploy to a remote Web Server, enter the HTTP port of the remote server. |
|
Web Root Path |
Click Browse to navigate to the path to the IIS Web site home directory (for example: C:\Inetpub\wwwroot). |
For detailed instructions about these settings, refer to the section called “Web Server profile settings” in PowerServer Toolkit User Guide.
Step 2: Click Test Web Server Settings.
PowerServer Toolkit will try to connect to the Web server with the IP (localhost) and port (80). Make sure the test is successful before you continue.
Step 3: Click OK.
WebServerTutor is added to the Web Servers list.
A deployment profile associates PowerServer(s) and Web server(s) as a group used for Web deployment.
Step 1: In the Deployment Profile Name list box, select Local Deployment.
If no deployment profile is available, create one by following instructions in the the section called “Deployment profile settings” in PowerServer Toolkit User Guide.
Step 2: Select PowerServerTutor in the PowerServer list and select WebServerTutor in the Web Servers list.
Step 3: Click Next to proceed.


