Step 1: Click the Configure
(![]() ) icon on the PowerServer Toolkit. The application
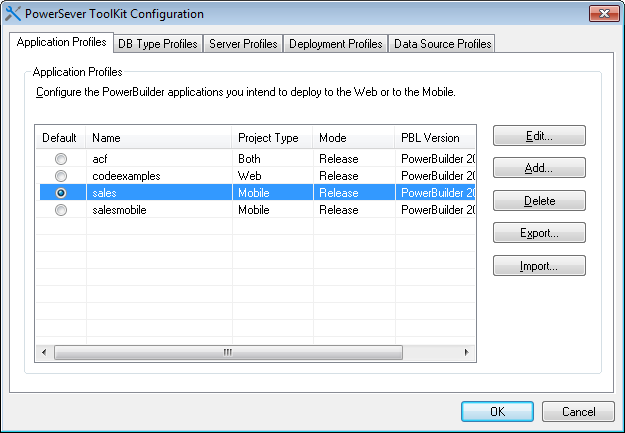
you configured just now is listed in the Application Profiles tab of the PowerServer Toolkit Configuration window.
) icon on the PowerServer Toolkit. The application
you configured just now is listed in the Application Profiles tab of the PowerServer Toolkit Configuration window.
Step 2: In the Application Profiles tab, select the application and then click Edit.
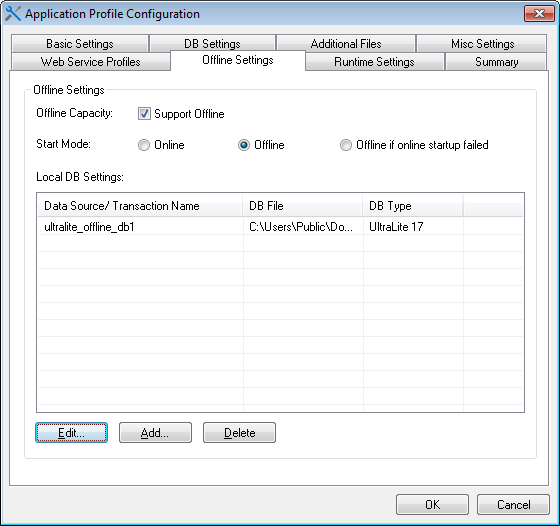
Step 3: In the Application Profile Configuration window, select the Offline Settings tab.
Step 4: In the Offline Capacity area, select the Support Offline option.
Step 5: In the Start Mode area, select Offline if online startup failed (recommended for the development and test stage), or select Offline (recommended for the production stage). Remember to re-deploy the application if the mode is changed.
-
Offline if online startup failed mode allows the application to start as an online application which connects with PowerServer, and if connection with PowerServer failed, the app will start as an offline application. If you are still developing the app and need to test the new functions, this mode is recommended because the app will automatically get the latest changes from PowerServer once it connects with PowerServer successfully during startup.
-
Offline mode allows the application to start as an offline application which runs locally on the mobile device without connecting with PowerServer, except for the very first time after installed when the configuration information needs to be downloaded to the mobile device. After that, the application will run as a local/offline application without needing any network connections, and will not get updates from PowerServer unless the app calls the relevant APIs specially provided by PowerServer Mobile (for details, see Tutorial 5: Update the Offline App) or the app is removed from the mobile device and then downloaded and installed again.
Step 6: In the Local DB Settings area, click Add to specify the local database settings.
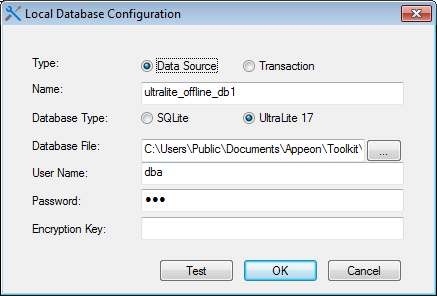
Step 7: In the Local Database Configuration window, do the following:
-
Select Data Source or Transaction as the connection type. If you intend to use the transaction object to connect with the local offline database, select Transaction here, if you intend to use the CacheName DBParm parameter to connect with the local offline database, select Data Source. For more details on the connection type, see Step 2 in Connect with the local database in Tutorial 3.
-
Enter the transaction object name or data source name in the Name text box. To configure for the Transaction type, enter the actual name of the transaction object used in the application. To configure for the Data Source type, enter the same name of the CacheName DBParm parameter specified in the application.
-
Select SQLite or UltraLite 17 (according to the offline database the application uses) as the database type.
-
Click the browse (...) button to select the database file from the Database File field. The database file name cannot be "appeondb.db".
-
Enter the user name for the database in the User Name text box. This field is effective for UltraLite database only.
-
Enter the password for the database in the Password text box. This field is effective for UltraLite database only.
-
Enter the encryption key for the database in the Encryption Key text box. This field is effective for UltraLite database only. The encryption key must be the same one you input in the Sybase Central when creating the database. See See also: Encrypt UltraLite database.
-
Click OK.
Step 8: Click OK to close the Application Profile Configuration window.


