When you install PowerBuilder, the setup program installs four directories into the PowerBuilder 19.0\SDK\PBNI\wizards directory:
-
VCProjects 7.0
-
VCProjects 7.1
-
VCProjects 8.0
-
VCWizards
If Microsoft Visual Studio is already installed on your computer, the setup program also installs the appropriate files into your Visual Studio installation.
Table A-1: Where wizard files are installed
|
Visual Studio version |
Files copied |
Destination |
|---|---|---|
|
Visual Studio 2005 |
VCProjects 8.0 VCWizards |
..\Microsoft Visual Studio 8\VC\VCProjects ..\Microsoft Visual Studio 8\VC\VCWizards |
|
Visual Studio .NET 2003 |
VCProjects 7.1 VCWizards |
..\Microsoft Visual Studio .NET 2003\Vc7\VCProjects ..\Microsoft Visual Studio .NET 2003\Vc7\VCWizards |
|
Visual Studio .NET 2002 |
VCProjects 7.0 VCWizards |
..\Microsoft Visual Studio .NET\Vc7\VCProjects ..\Microsoft Visual Studio .NET Vc7\VCWizards |
If Visual Studio is not already installed when you install PowerBuilder, see the install.txt file in the PBNI\wizards\VCWizards\PBNIWizard directory for how to install the wizard later.
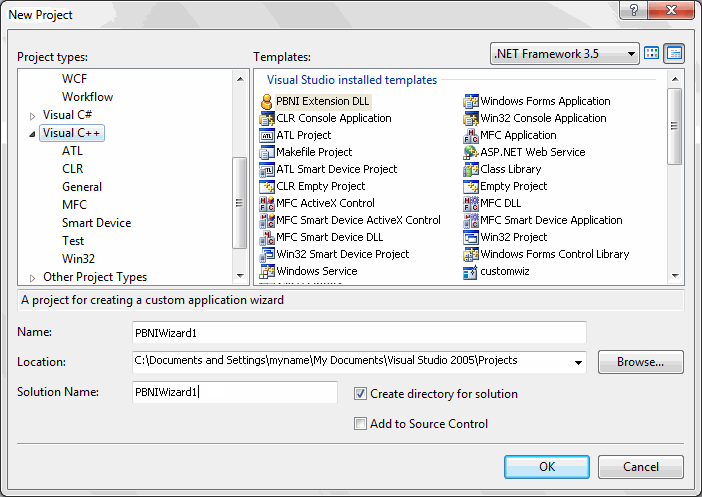
To check whether the wizard is installed in Visual Studio, select File>New>Project from the menu bar , select Visual C++ Projects, and scroll the Templates pane to see the PBNI wizard.

The PBNI Application Wizard lets you choose whether to create a visual or nonvisual extension, whether to include support for Unicode and global functions, and whether to generate a header file.
To create a new PBNI project:
-
Start Visual Studio, select File>New>Project, select Visual C++ Projects, and scroll the Templates pane to see the PBNI wizard.
-
Select PBNI Extension DLL, enter a name and location for the project, and click OK.
-
Click Application Settings if you want to create a visual extension or change any other settings.
The default is to create a nonvisual extension with Unicode support.
-
Click Finish.
See the ReadMe.txt file created by the wizard for a description of the generated source and header files.
If the project does not build correctly, you might need to turn off precompiled headers in the project's Property Pages dialog box and set the path for the PBNI include files.
To set project options for PBNI library and include files:
-
In Visual Studio, select Tools>Options.
-
Select Projects and Solutions>VC++ Directories.
-
Select Include Files from the Show Directories For drop-down list and click the New icon. Then click the browse button, browse to the location of the PowerBuilder 19.0\SDK\PBNI\include directory, and click OK.
-
Click OK to close the Options dialog box.
By default, the project is compiled for Unicode character sets. You can change this setting in the wizard. If you want to change it to compile for ASCII (SBCS) character sets after you have created the project, you can remove the _UNICODE preprocessor option.
When you have finished coding the project, build the project from the Build menu to create a DLL with the extension .pbx. By default, the extension is created in the Debug directory.
Then, you can import the PBX into a PBL in your PowerBuilder target and use it as described in Using the extension.


