Now you create a child window and use it as the MDI sheet window for the application.
-
Click the New button in the PowerBar.
The New dialog box is displayed.
-
Click the PB Object tab.
Select the Window icon and click OK.
-
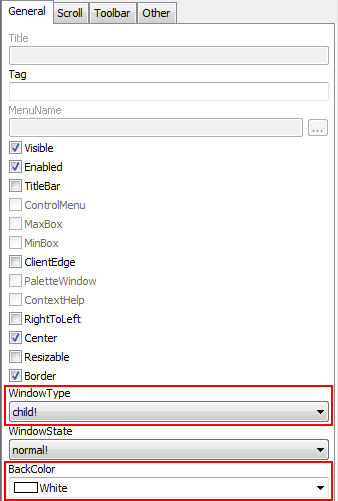
Select child! in the WindowType list box on the General page in the Properties view.
Child window can only be opened from within another window, such as the MDI window, main window etc. Leave the TitleBar check box unchecked so the child window has no title bar.
Select White in the BackColor list box.
The window is displayed with white background in the Layout view.
-
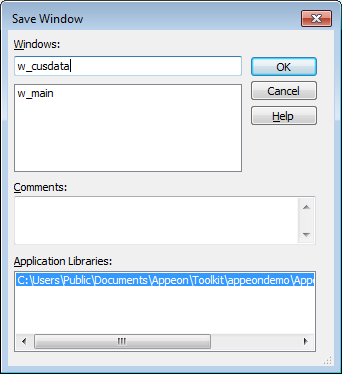
Select File >Save from the menu bar.
-
Type w_cusdata for the window name.
-
Click OK.
PowerBuilder saves the child window. If you expand the tutorial workspace, the tutorial target, and tutorial.pbl in the system tree, you can see w_cusdata listed under it.

Now you change the size of the w_cusdata window. When you run the application, the window is displayed in the size that you specify.
-
Open w_cusdata in the Window painter if it is not already open.
-
Click the Other tab in the Properties view.
-
Type 4672 in the Width text box and 2836 in the Height text box.
The size of the window rectangle in the Layout view changes.
-
Select File > Close from the PowerBuilder menu.
Click Yes when you are prompted to save your changes.
The Window painter closes.
When you run the application, the w_cusdata window will be sized as you specified.
Controls allow users to interact with PowerBuilder objects, such as windows and DataWindows. You set properties of these controls and later add script for control events and functions.
Selecting a control button from the PainterBar
You can add controls from the Insert menu or by selecting a control button in PainterBar1. Unless you customize your toolbars, there is only one control button that appears in the PainterBar. When you first open a painter, PainterBar1 includes the CommandButton control button, which has a down arrow to its right. Clicking the down arrow displays a drop-down list of control buttons.
Some of the controls you can select from the drop-down list are described in the table below:
Table 3. Controls
|
Button appearance |
Control type |
Use in tutorial |
|---|---|---|
 |
CommandButton |
Default icon for the control button in PainterBar1. You add command buttons later in this section. |
 |
Picture |
To add a picture to the sheet window. |
 |
StaticText |
To add text labels to the sheet window. |
 |
SingleLineEdit |
To add user entry text boxes to the sheet window. |
 |
DataWindow | To add a DataWindow to the sheet window. |
After you select a control, it appears in place of the CommandButton button on PainterBar1.
Now you modify the sheet window you just created by adding controls and changing some of their properties. You:
Now you add a DataWindow control to the w_cusdata window.
-
Double-click w_cusdata in the System Tree.
The w_cusdata window opens in the Window painter.
-
Make sure the Layout view is visible in the Window painter.
-
Select the DataWindow control (
) from the drop-down list of controls
or
Select Insert > Control > DataWindow from the menu bar.
Unless you customize your toolbars, there is only one control button that appears in the PainterBar. When you first open a painter, PainterBar1 includes the CommandButton control button, which has a down arrow to its right. Clicking the down arrow displays a drop-down list of control buttons.
-
Click inside the rectangular window in the Layout view.
A DataWindow control is displayed where you clicked in the Layout view. At the same time you add the control, the Properties view switches from displaying the window properties to displaying the control properties.
How to delete controls
If you add a control to the window and later decide you do not want it, select the control and press the Delete key. This deletes the control and its scripts.
-
Make sure the new control is selected in the Layout view.
Small black squares at the corners indicate that the control is selected. The Properties view displays the properties of the selected control.
-
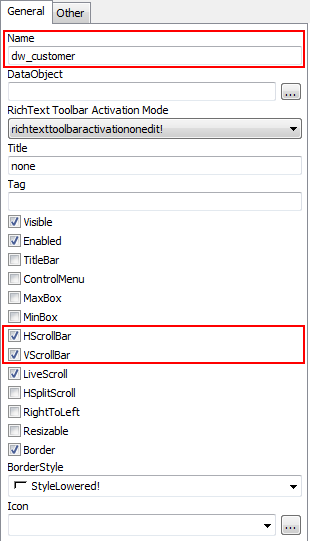
Select the text dw_1 in the Name text box on the General tab of the Properties view.
Type dw_customer in the Name text box.
Select the HScrollBar and VScrollBar checkboxes.
PowerBuilder adds a horizontal scroll bar and a vertical scroll bar to the control. It also changes its name to dw_customer. The prefix dw_ is standard for DataWindow controls.
-
Click the Other tab in the Properties view.
Type 50 in the X text box, 45 in the Y text box, 4560 in the Width text box and 2526 in the Height text box.
You change the position and size of the DataWindow control. You might want to adjust its size again after you preview the window.
-
Select File > Save from the menu bar.

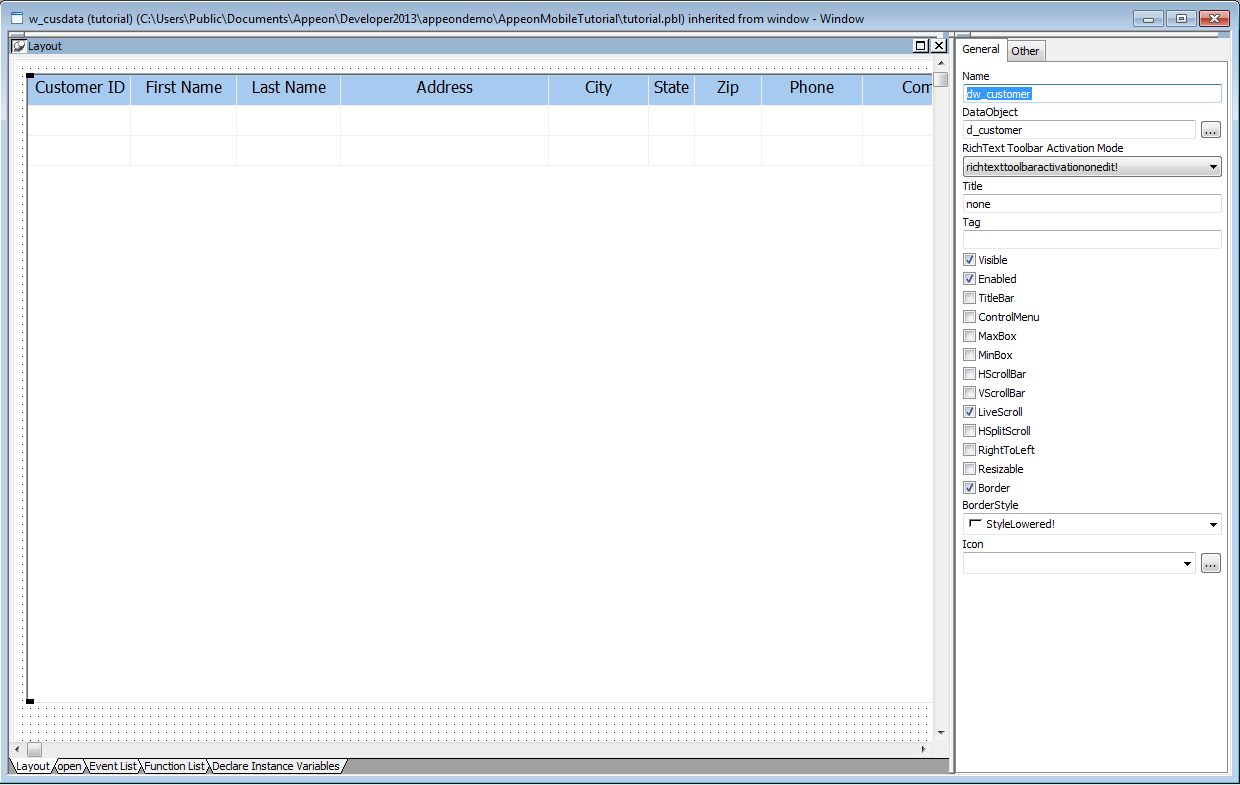
Now you attach the d_customer DataWindow object to the dw_customer DataWindow control.
-
Make sure the dw_customer DataWindow control is selected in the Layout view.
-
Click the General tab of the Properties view.
-
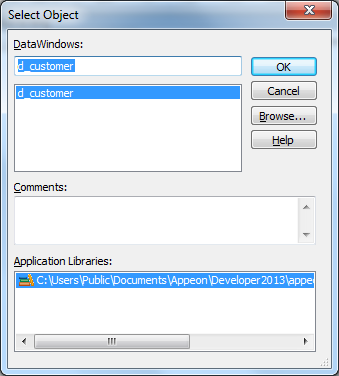
Click the ellipsis button next to the DataObject box.
The Select Object dialog box appears.
-
Select d_customer in the DataWindows list box and click OK.
PowerBuilder associates the d_customer DataWindow object with the dw_customer DataWindow control.
The Layout view now shows the d_customer DataWindow headings inside the dw_customer control, but you do not see any data yet. The DataWindow does not execute its SELECT statement until you run the application.
Adding DataWindow objects to the window using drag and drop
In this tutorial, you use a standard DataWindow control. Alternatively, you can just simply select the DataWindow object you want from the System Tree and drag it onto the window in the Layout view. PowerBuilder creates the DataWindow control for you.
-
Select File >Save from the menu bar.
Now you add CommandButton controls to the w_cusdata window. Later you define scripts that execute when users click these buttons.
-
Select the CommandButton control (
) from the drop-down list of controls
or
Select Insert > Control > CommandButton from the menu bar.
-
Click below the DataWindow control at the bottom of the w_cusdata window in the Layout view.
A CommandButton control is displayed where you clicked.
-
Right-click the CommandButton control and select Duplicate from the pop-up menu.
PowerBuilder creates a duplicate of the selected control to the right.
Repeat this step to create another two duplicates.
-
Adjust the location of these four controls as needed so that there is some space between them.
Selecting an alignment tool from the PainterBar
You can access a drop-down list of alignment tools by clicking the Align button on PainterBar2.
-
Select File >Save from the menu bar.
Now you define the properties of the CommandButton controls.
-
Select the first CommandButton control.
The Properties view displays the properties of the CommandButton control.
-
Type cb_retrieve in the Name text box on the General page of the Properties view.
Type Retrieve in the Text box.
This step changes the default name of the control to something more descriptive and adds a text label (Retrieve) to the button.
-
Select the second, the third and the fourth CommandButton control successively.
Type cb_insert, cb_delete, and cb_update in the Name text box, and type Insert, Delete, and Update in the Text box respectively.
-
Select these four CommandButton controls, and type 16 in the font size box in the StyleBar.
-
Select File >Save from the menu bar.
The window should now look like this in the Layout view:

Now you add scripts to retrieve, insert, delete, and/or update data in the DataWindow.
-
Double-click the Retrieve CommandButton in the Layout view
or
Select cb_retrieve in the first drop-down list box of the Script view.
The Clicked event should be the selected event in the second drop-down list box. If it is not, select it. The Clicked event script is empty.
-
Type these lines in the script area for the Clicked event.
dw_customer.setTransObject(SQLCA)
IF dw_customer.Retrieve () <> -1 THEN
 dw_customer.SetFocus ()
END IF
dw_customer.retrieve()
These lines retrieve data for the DataWindow control.
-
Select File > Save from the menu bar.
The script should save without error. If you get an error message, make sure you have typed the control and function names correctly.
-
Select cb_insert in the first drop-down list box of the Script view.
Type the following line in the script area for the Clicked event.
dw_customer.Reset()
dw_customer.insertRow(0)
dw_customer.SetFocus()
These lines insert data into the DataWindow control.
Select File > Save from the menu bar.
-
Select cb_delete in the first drop-down list box of the Script view.
Type the following line in the script area for the Clicked event.
dw_customer.deleterow( dw_customer.getrow() )
This line deletes data in the DataWindow control.
Select File > Save from the menu bar.
-
Select cb_update in the first drop-down list box of the Script view.
Type these lines in the script area for the Clicked event.
if dw_customer.update() = 1 then
    commit;
    messageBox("Information", "The data is updated successfully!")
else
    rollback;
    messageBox("Error", "Failed to update the data!")
end if
These lines update the data to the database.
Select File > Save from the menu bar.
Now you write scripts to connect with the Appeon Sample database.
-
Select w_cusdata from the first drop-down list box in the Script view.
or
Double-click the blank area inside the w_cusdata window in the Layout view.
The Open event should be the selected event in the second drop-down list box. If it is not, select it. The Open event script is empty.
-
Type these lines in the script area for the w_cusdata Open event:
SQLCA.DBMS = "ODBC"
SQLCA.AutoCommit = False
SQLCA.DBParm = "ConnectString='DSN=AppeonSample;UID=;PWD='"
connect;
These lines connect to the Appeon Sample database.
-
Select File > Save from the menu bar.
-
Select File > Close from the menu bar. The Window painter closes.
Now you write scripts in the Open menu to open the w_cusdata window as the MDI sheet window.
-
Double-click m_main in the system tree.
The Menu painter displays the menu.
-
Select m_tutorial.m_open in the first list box in the Script view
or
Double-click the Open menu item in the WYSIWYG view.
The full name of the Open menu item displays in the first list box of the Script view. It includes the m_tutorial prefix to indicate that it is in the Tutorial menu.
-
Select Clicked in the second drop-down box if it is not already selected.
Type this line for the Clicked event:
openSheet(w_cusdata, "w_cusdata", w_main, 1, Layered!)
This calls the OpenSheet function to display the sheet window you created.
-
Select File > Save from the PowerBuilder menu bar.
PowerBuilder compiles and saves the menu scripts.
