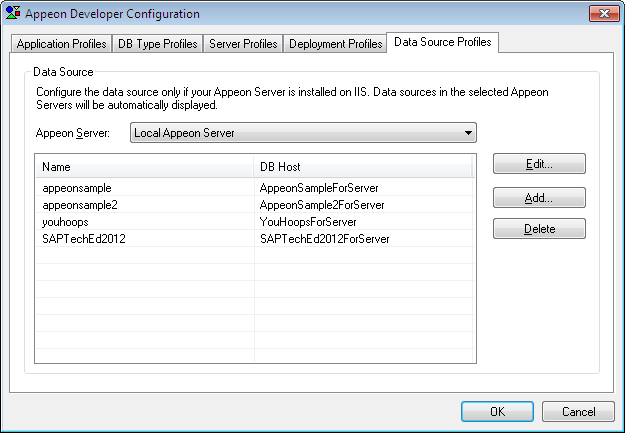
Step 1: In the Appeon Developer Configuration window, click the Data Source Profile tab.
Step 2: Select Local Appeon Server from the Appeon Server dropdown list box.
Step 3: Click the Add button to create a data source in the selected Appeon Server.
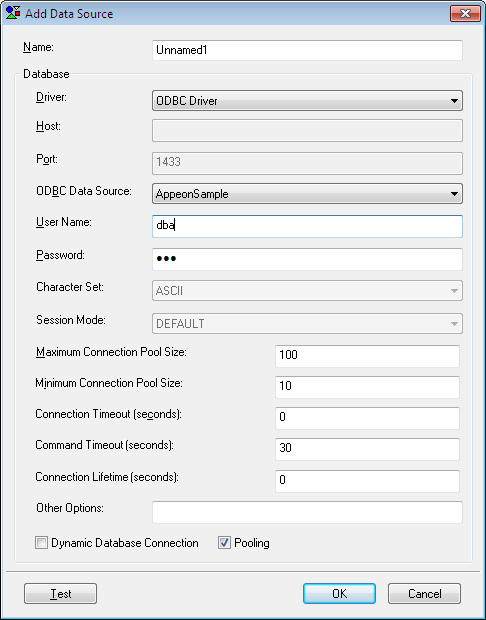
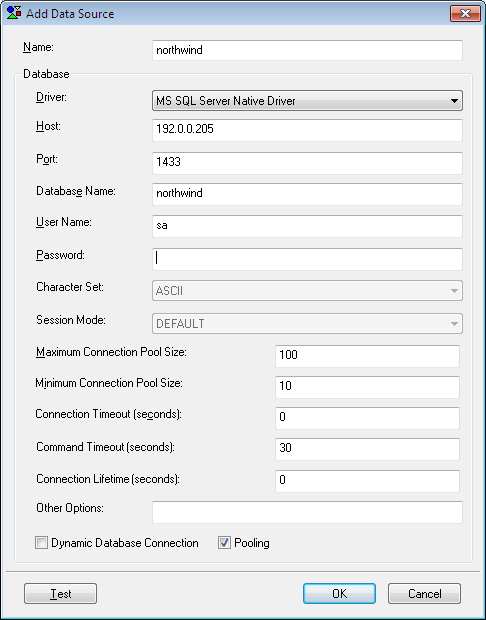
Step 4: On the Add Data Source window, specify the data source settings. Below we take SAP ASA/SQL Anywhere and Microsoft SQL Server database as examples.
Steps for configuring a data source for SAP ASA/SQL Anywhere database:
1. In the Name text box, input any text you like as the name of the data source.
2. Select ODBC Driver from the Driver dropdown listbox.
3. Select the data source from the ODBC Data Source dropdown listbox.
4. Input the database login user name and password respectively in the User Name text box and the Password text box.
5. Keep the rest as default, and then click Test. Make sure the test is successful.
6. Click OK.
Steps for configuring a data source for Microsoft SQL Server database:
1. In the Name text box, input any text you like as the name of the data source.
2. Select MS SQL Server Native Driver from the Driver dropdown listbox.
3. Input the IP address or machine name of the database server in the Host field.
4. Input the port number of the database server in the Port field.
5. Input the database name, database login user name and password respectively in the Database Name, the User Name and the Password text boxes.
6. Keep the rest as default, and then click Test. Make sure the test is successful.
7. Click OK.
Tip: you should check with your SQL Server administrator to verify the port number, the user name, and the password are correct.
Now the data source you added will be listed in the Data Source Profiles tab. You can select it when you create the application profile for your application in Task 3: Configure and deploy the application.


