Product Activation is a set of tools for viewing product license information and activating products. There are two tools: Licensing and Support.

The Licensing tool enables you to view the detailed license information, activate or de-activate a PowerServer, and update the license.
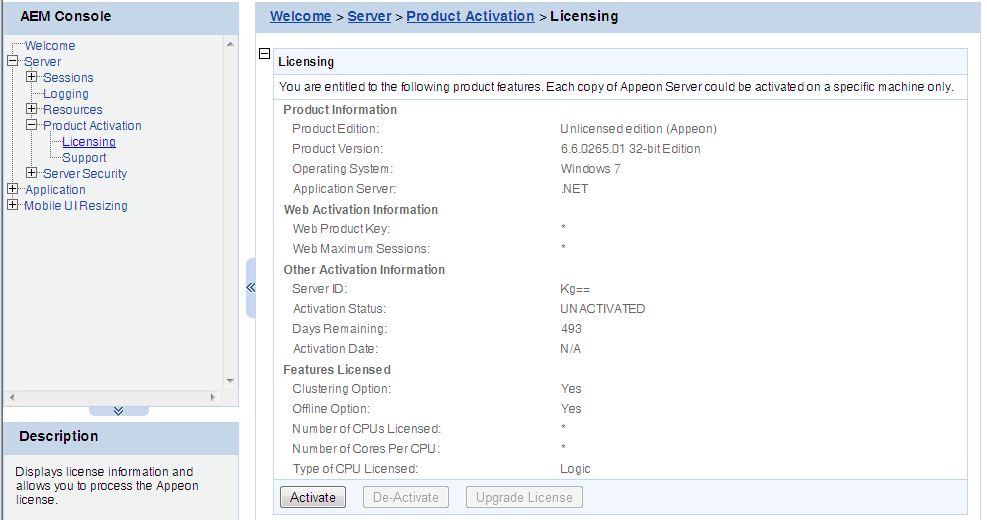
After you purchase the product, you will need to activate PowerServer for permanent use. See the following flowchart for the activation process.

The following are detailed instructions for you to activate the product via AEM:
Step 1: Generate the activation request (the Appeon BIN activation file).
-
On the Licensing page, click the Activate button.
-
On the Product Activation page, do the following:
-
From the Product Key Type dropdown list box, select the product type that you have purchased.
The difference between PowerServer Web & PowerServer Mobile and PowerServer Web & Mobile is mainly the way of allocating the sessions/devices. For PowerServer Web & Mobile, Web apps and mobile apps can share the unused sessions/devices; while for PowerServer Web & PowerServer Mobile, the Web apps and the mobile apps are strictly limited by their own session counts. For example, if the Web session is set to 5, and the Mobile session is set to 10, then for PowerServer Web & PowerServer Mobile, the Web sessions cannot exceed 5 and the Mobile sessions cannot exceed 10, while for PowerServer Web & Mobile, so long as the total sessions do not exceed 15, the Web session can go over 5 if there are unused Mobile sessions, or the Mobile sessions can go over 10 if there are unused Web sessions.
-
From the Control Type dropdown list box, select a control type.
-
Application: it controls how many applications on this PowerServer can be accessed at a particular time.
-
Session/Device: it controls how many sessions and/or devices can access the apps on this PowerServer at a particular time. For Web applications, each application instance running on the client is considered as one session, for mobile applications, each mobile device that is accessing the app (no matter how many apps) is considered as one device.
The Appeon mobile app will need to get the device ID when running on the mobile device, so that the app as well as other Appeon mobile apps running on the same mobile device can be recognized as running on one device by the Appeon license file, not running on multiple devices.
About App ID for iOS apps
For iOS apps, to enable the app to get the device ID successfully, you will need to correctly specify the App ID Prefix and the App ID Suffix (Bundle ID):
-
App ID Prefix: you should always input the same App ID Prefix for all Appeon mobile apps.
You can specify the App ID Prefix when packaging the mobile project in the PowerServer Toolkit Package tool in PowerServer Toolkit User Guide.
-
App ID Suffix (Bundle ID): Bundle ID is used to identify the application, therefore it must be unique for different applications.
You can specify the Bundle ID when packaging the mobile project in the PowerServer Toolkit Package tool in PowerServer Toolkit User Guide.
You should specify the consistent Bundle ID in the Xcode project for the same application. For details, refer to the section called “Task 3.1: Set Bundle Identifier” in PowerServer Mobile Tutorials.
-
-
-
In the product key field(s), double check the product key and modify it if it is incorrect.
-
From the Server Type list, select Dedicated Server if the server is running on hardware that is dedicated for your use; select Azure Virtual Machine if the server is running on a virtual machine created in Windows Azure; select AWS Virtual Machine if the server is running on a virtual machine created in Amazon Web Services.
-
When Azure Virtual Machine server type is selected, select the appropriate deployment model for the Azure virtual machine.
-
Resource Manager VM -- You will need to provide the following information: Azure Subscription ID, Directory ID, Application ID, Key Value, and Virtual Machine Name.
In order to get these information, you will need to first make configurations according to https://docs.microsoft.com/en-us/azure/azure-resource-manager/resource-group-create-service-principal-portal.
-
Classic VM -- You will need to provide the following information: Azure Subscription ID, and Deployment Label.
-
Upload Package -- You will need to provide the following information: Azure Subscription ID, and Deployment Label.
You can get the information of Subscription ID and Deployment Name by selecting the proper service name from the Azure website portal.
IMPORTANT: If Classic VM or Upload Package deployment model is selected, you will also need to log into the Azure administration portal (https://manage.windowsazure.com/), download the certificate file (https://manage.windowsazure.com/publishsettings), rename the file to credentials.publishsettings and copy the file to the local PowerServer installation directory \%appeon%\AEM\Cert. If the Cert folder does not exist, please manually create it.
Please make sure you complete these steps before you apply the Appeon license file, and keep the certificate file exist in the specified directory whenever PowerServer is activated and running.
-
-
When AWS Virtual Machine server type is selected, specify the settings for the server instance created in Amazon Web Services. These settings can be obtained from the AWS console. For detailed instructions, see AWS server instance settings.
-
(Optional) Check the Is Virtual Machine checkbox, if the dedicated server is running on a virtual machine rather than a physical machine.
-
(Optional) Check the Support Offline checkbox, if your license supports offline features.
-
Click the Generate Activation Request button.
-
-
Click the Download File button to download the request file which is by default named as license.activation.bin and send it to
<license@appeon.com>. The request will be processed in Appeon and an activated permanent license (license.appeon) will be sent to you later.


Step 2: Install the permanent license file.
The license file must be installed within 30 days after it's generated. If this 30-day install period has expired, the license file cannot be installed, and there will be an error in AEM when you try to install it. In this case, you will need to send the license file back to Appeon and have Appeon extend the install period for this file. Once you get the license file, follow the steps below to install it via AEM.
-
After getting the permanent license (license.appeon) from Appeon, click the Apply License button.
-
Click the Browse... button and select the license.appeon file. The file name must be exactly license.appeon, and it is case-sensitive. Click the Import button to import the license file. Please make sure the license file is imported successfully, and then restart PowerServer.
-
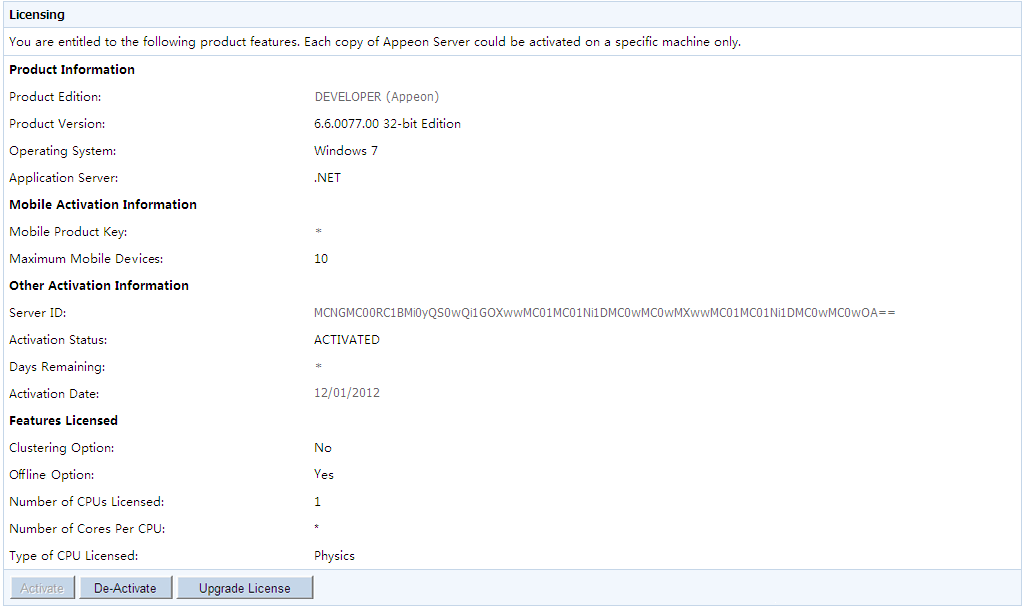
After you restart PowerServer, go back to the Licensing page, and verify that Activation Status is shown as Activated.
-
Back up your permanent license file so you can use it again in case you will reinstall PowerServer within the 30-day install period.

The information required for activating PowerServer on AWS includes: the region code of the account, the key ID and secret key of the user, the keyword prefix of the server instance, and the number of instances allowed for deploying PowerServer. All these information (except for the number of instances) can be obtained from the AWS console, as highlighted below.
-
Region: the region code (NOT the region name) of the AWS account.
To get the region code of the AWS account, first log into the AWS console and get the region name on the top right corner of your account center, then search the region name on the Web page: http://docs.aws.amazon.com/general/latest/gr/rande.html#apigateway_region to get the corresponding region code.
-
Key ID: The access key ID of the AWS user.
-
Secret Key: The access secret key of the AWS user.
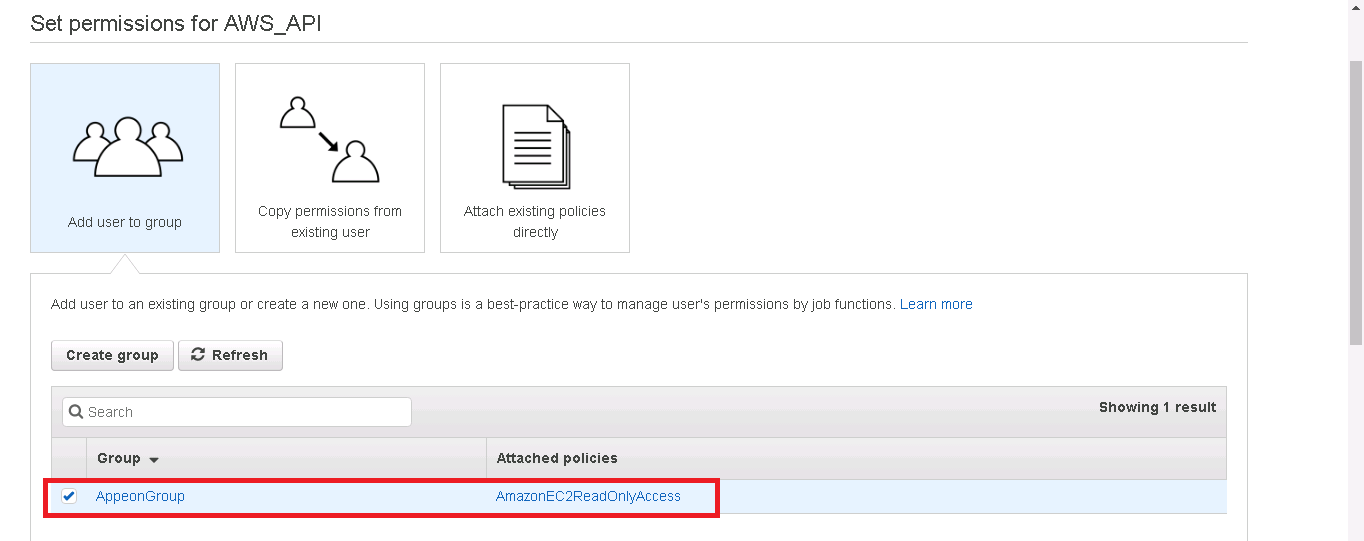
To get the access key ID and the access secret key of the AWS user, first log into the AWS console and go to the Users area.
When you add a new user, be sure to select the Programmatic access type, and assign the user to the group with AmazonEC2ReadOnlyAccess permissions.
After the user is added, you can get the access key ID and the access secret key.
-
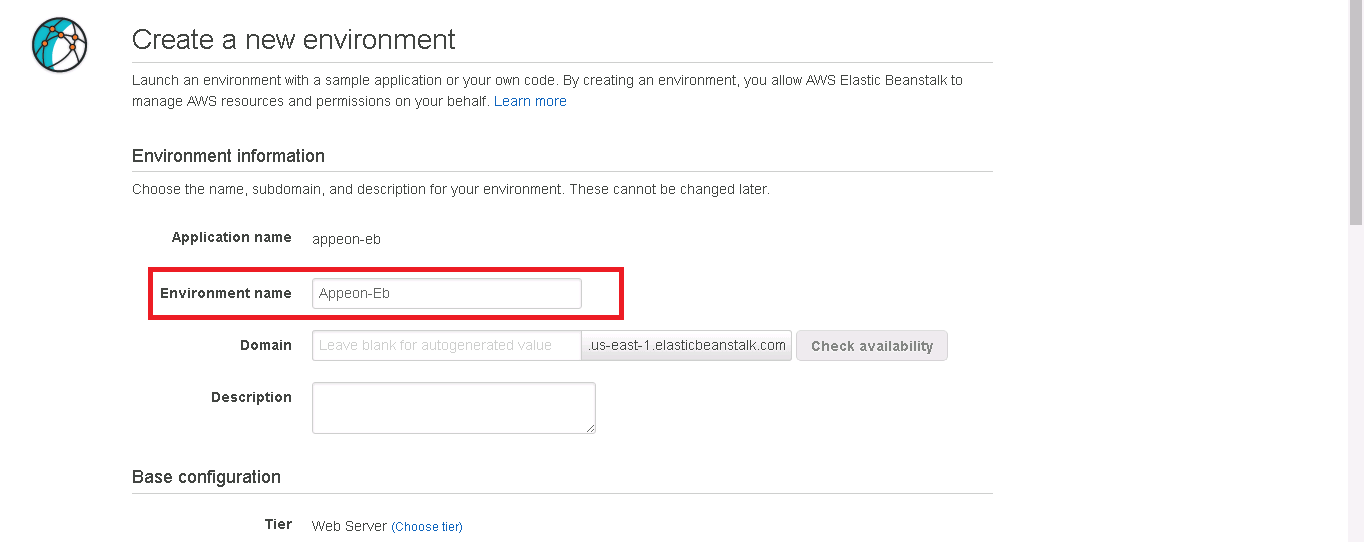
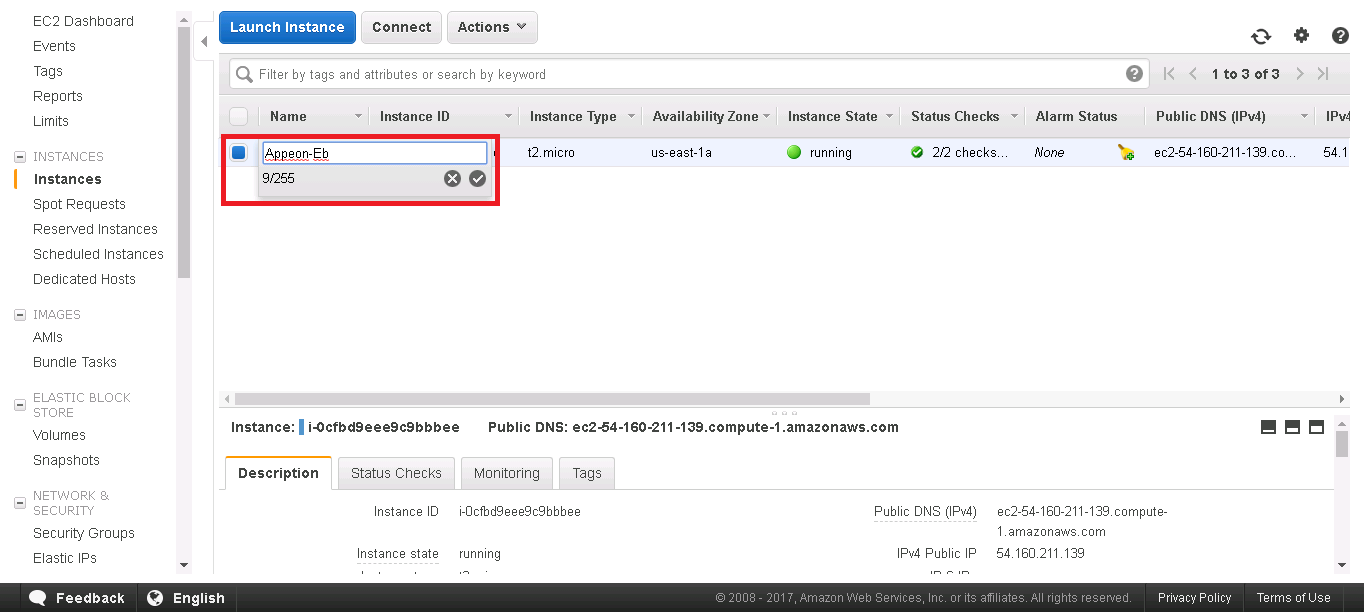
Keyword Prefix: A string that matches with the name prefix of the server instance(s) where PowerServer is deployed. There are two types of server instance where PowerServer can be deployed: Elastic Beanstalk(EB) and Amazon Elastic Compute Cloud(EC2).
When creating an instance of Elastic Beanstalk(EB), the Environment name must start with the keyword prefix specified for the PowerServer license activation. For example, "Appeon" is the keyword prefix.
When creating an instance of Amazon Elastic Compute Cloud(EC2), the key pair must start with the keyword prefix specified for the PowerServer license activation. For example, "appeon" is the keyword prefix.
After you create an instance (either Elastic Beanstalk(EB) or Amazon Elastic Compute Cloud(EC2)), you can modify the instance name. Make sure the prefix of the instance name matches with the keyword prefix specified for the PowerServer license activation.
-
Numbers of Services: The maximum number of service instances allowed for deploying PowerServer under the current AWS account. Simply specify a number in the AEM page.


Each copy of PowerServer can only be activated on one machine. If you want to activate a PowerServer on a different machine, you would need to de-activate PowerServer on the previous machine first and then activate it on the new machine, by following the instructions below.
Step 1: De-activate PowerServer on the previous machine.
-
Click the De-Activate button in the Licensing page.
-
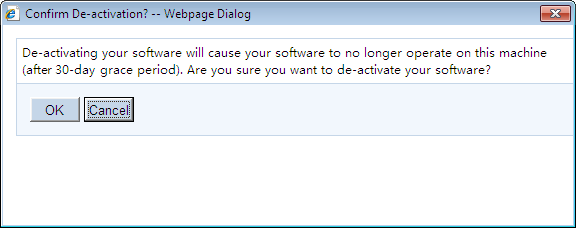
You will be prompted by two sequential messages to confirm whether you want to deactivate PowerServer on this machine. IMPORTANT: Please be cautious with this action, as it is irreversible, and once you click OK, the license file will become invalid and can no longer be installed on this machine unless it is re-generated. Click OK to continue if you are sure to de-activate this PowerServer.
-
Click the Download File button to download the file whose name is license.reactivation.bin by default.


Step 2: Generate the activation request for PowerServer on the new machine.
Follow the steps in Generate the activation request to get the license.activation.bin file and save it in a safe place.
Step 3: Email Appeon to generate the license file for the new server.
You should send both the license.reactivation.bin file and the
license.activation.bin file to <license@appeon.com> to apply
a reactivated license for the new server.
Step 4: Install the license on the new server.
Appeon will process the reactivation request and send you a valid reactivated license file (license.appeon). You need to install this license file on the new server. For detailed instructions, please refer to Install the permanent license file.
Step 1: On the Licensing page, click the Upgrade License button.
Step 2: On the Upgrade License page, input the information for upgrading the license.
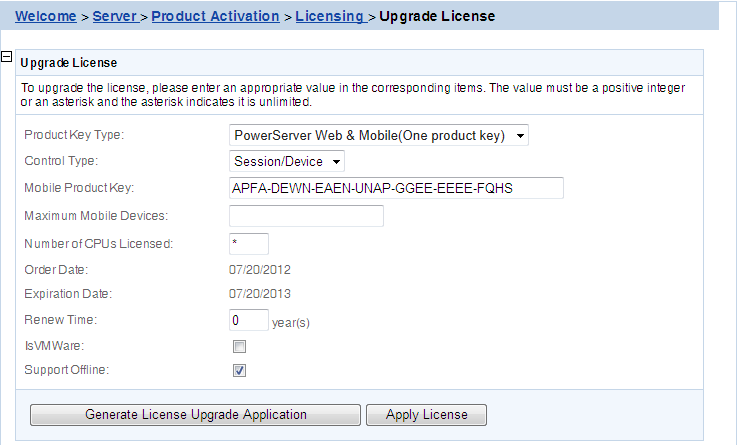
Step 3: Click the Generate License Upgrade Application button.
Step 4: Click the Download File
button to download the request file which is by default named as
license.update.bin and send it to <license@appeon.com>. The
request will be processed in Appeon and an upgraded license will be sent
to you later.

Step 5: After receiving the upgraded license from Appeon, click the Apply License button in the Upgrade License page.
Step 6: Click the Browse... button and select the license.appeon file. Click the Import button to import the license file. Please make sure the license file is imported successfully, and then restart PowerServer.

Step 7: After you restart PowerServer, go back to the Licensing page, and verify that the license information is updated, and the Activation Status is shown as Activated.
The Support tool enables you to view the valid product support period, which starts from the day you place the product order and expires in 1 year later. You can renew the support before or after the license expires, and apply the renewed license to extend the support period. Renew Support and Apply License will be enabled when the product is activated.

Support Expiration will not affect the normal running of Appeon. However, after the expiration you are no longer entitled to install product upgrades/EBFs or get technical support assistance from Appeon. You can renew your product support prior to the expiration date to ensure you are benefiting from the latest product enhancements, maintenance releases and the technical support assistance.
If you want to extend the Support, follow the steps below:
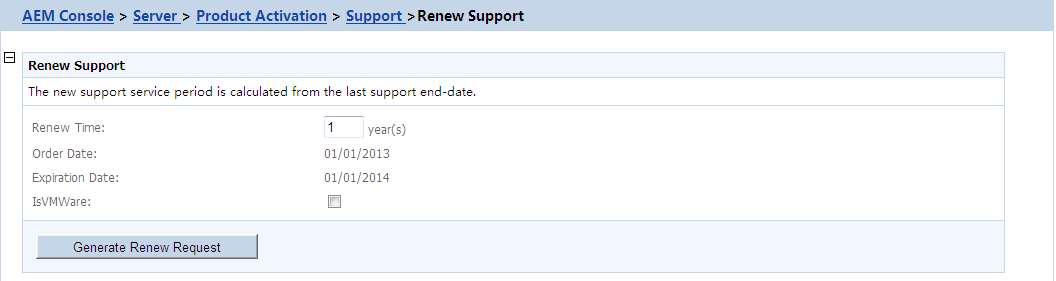
Step 1 - Click the Renew Support button. In the Renew Support page, enter the time you want to extend, which should only be an integer. Click the Generate Renew Request button. Note: The order date is counted from the first date when your last license expired.
Step 2 - Click the Download File
button to download the request file which is by default named as
license.support.bin and send it to <license@appeon.com>. The
request will be processed in Appeon and a new license with extended
support period will be sent to you later.

Step 3 - When you get the new license named license.appeon, click the Apply License button.
Step 4 - In the Apply License window, click the Browse... button to select the license.appeon file delivered by Appeon. Click the Import button to import your license file.

Step 5 - Restart PowerServer after importing the license file, and go back to the Support page to ensure the support is correctly extended.
