After you download the demo application and database and before you can successfully run the downloaded demo application, you will need to set up an ODBC data source to connect with the demo database.
Note
The demo database will be connected through the ODBC data source.
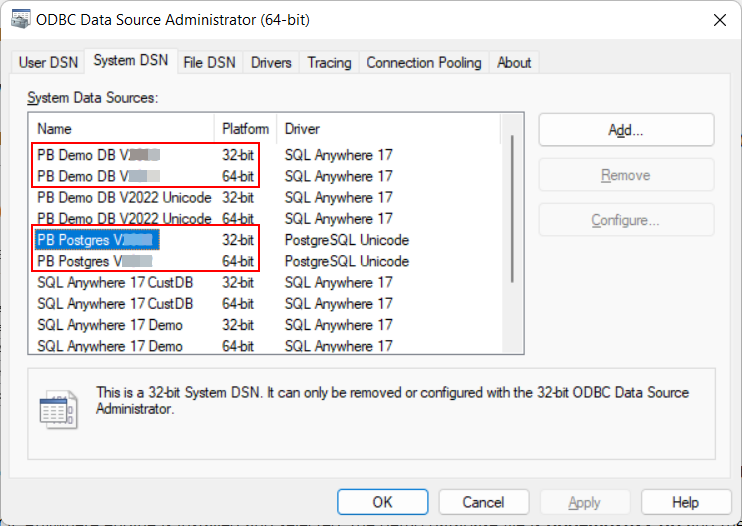
To use the demo database with the PowerBuilder Application projects and PowerClient projects, you will need a 32-bit ODBC data source (hence a 32-bit ODBC driver is required).
To use the demo database with the PowerServer projects, you will need a 64-bit ODBC data source (hence a 64-bit ODBC driver is required).
It is recommended that you create both the 32-bit and 64-bit ODBC data sources, with the same name.
To set up the ODBC data source with the PostgreSQL demo database,
-
Install PostgreSQL 12 and PostgreSQL ODBC driver (both 32-bit and 64-bit).
Make sure the Command Line Tools component is selected during the PostgreSQL 12 installation.
-
Restore the PostgreSQL demo database file. For example,
"C:\Program Files\PostgreSQL\12\bin\pg_restore" --host=127.0.0.1 --port=5432 --username="postgres" --clean --if-exists --dbname=PBDemo --verbose "C:\DB\pbpostgres2025R2.dmp"
-
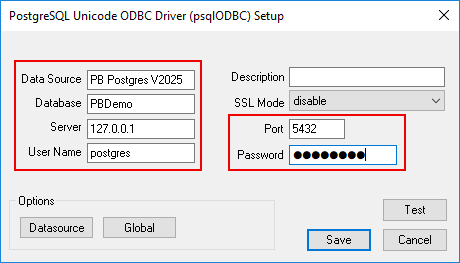
Create the ODBC data source that includes the following settings.
Data Source: PB Postgres V2025R2
Database: PBDemo
Server: [IP address for the database]
Username: [user name for the database, postgres, by default]
Port: [port number for the database, 5432, by default]
Password: [password for the database, postgres, for example]

To set up the ODBC data source with the SQL Anywhere demo database,
-
Install SQL Anywhere 17.
-
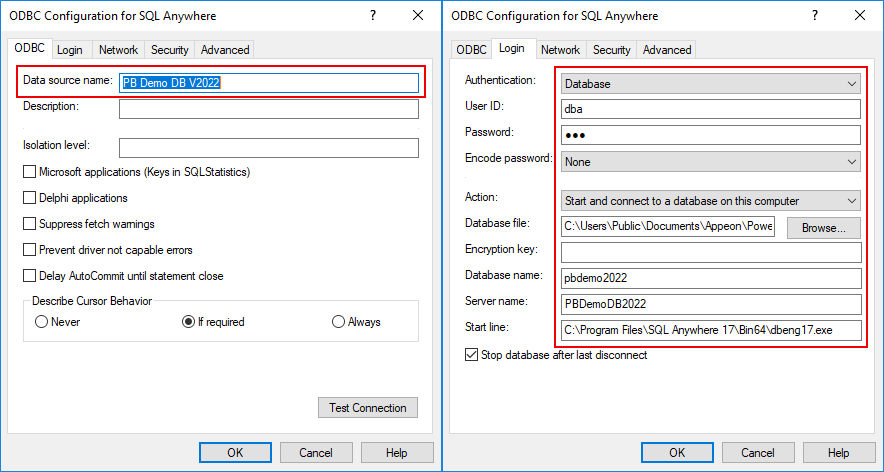
Create the ODBC data source that includes the following settings.
Data Source Name: PB Demo DB V2025R2
User ID: dba
Password: sql
Action: Start and connect to a database on this computer
Database file: [path to the database file]
Database name: pbdemo2025R2
Server name: PBDemoDB2025R2
Start line: [path to the SQL Anywhere engine]

Before setting up the ODBC data source with the SQL Server demo database, install and configure SQL Server properly.
SQL Server 2016, 2017, and 2019 are supported. You can follow the steps to install SQL Server. Please pay attention to the required items when installing it.
Step 1: Install SQL Server.
-
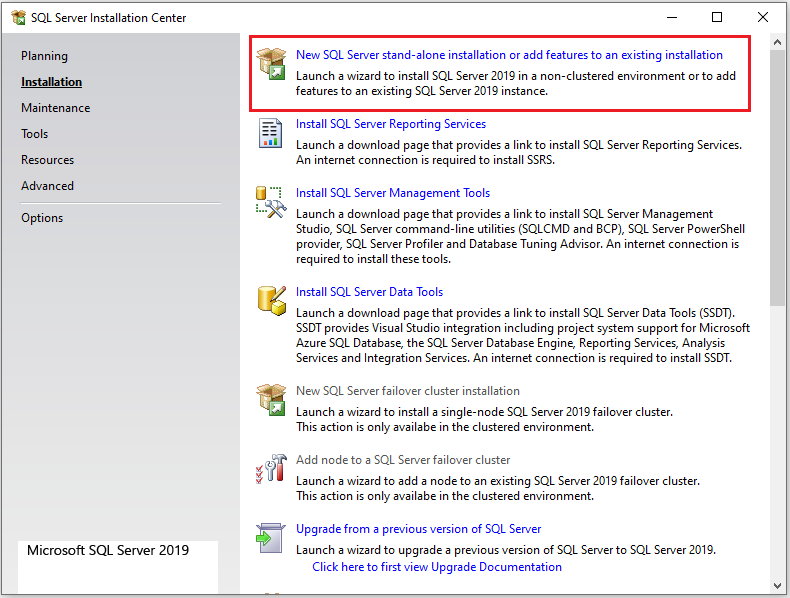
Select "New SQL Server stand-alone installation or add features to an existing installation".
-
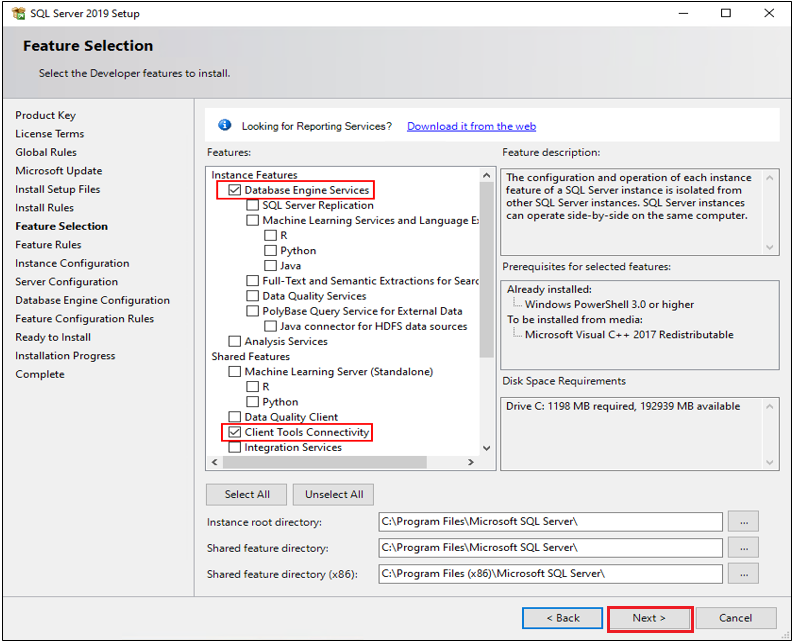
Click Next until the Feature Selection page displays. In this page, select these two features: Database Engine Services and Client Tools Connectivity.
-
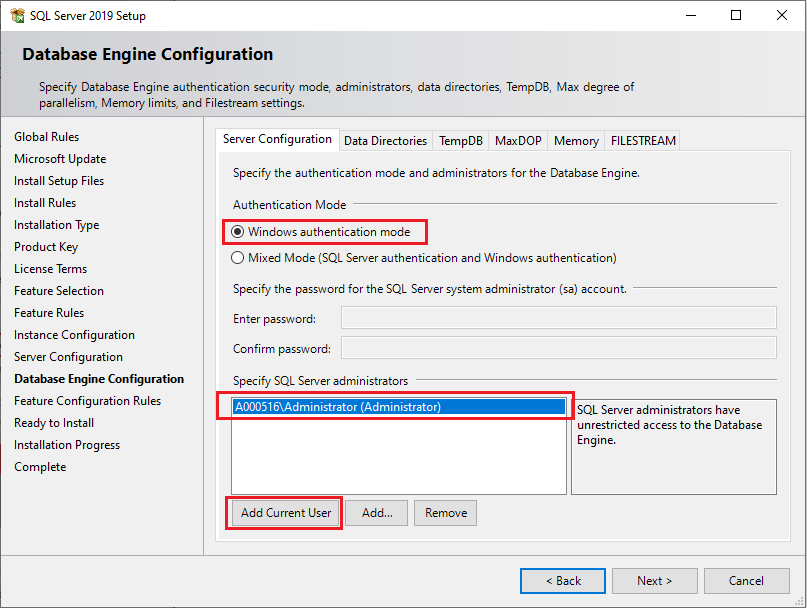
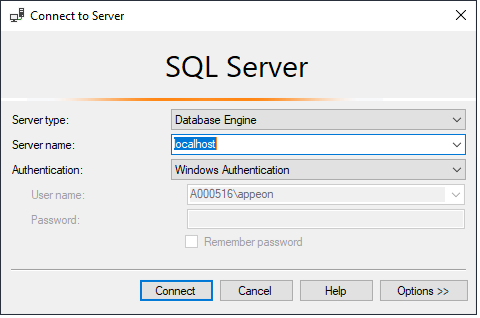
Click Next until the Database Engine Configuration page displays. In this page, the authentication mode is set as Windows authentication mode by default. Click Add Current User to add the current Windows user as the SQL Server administrator.
-
Click Next until the SQL Server installation completes.
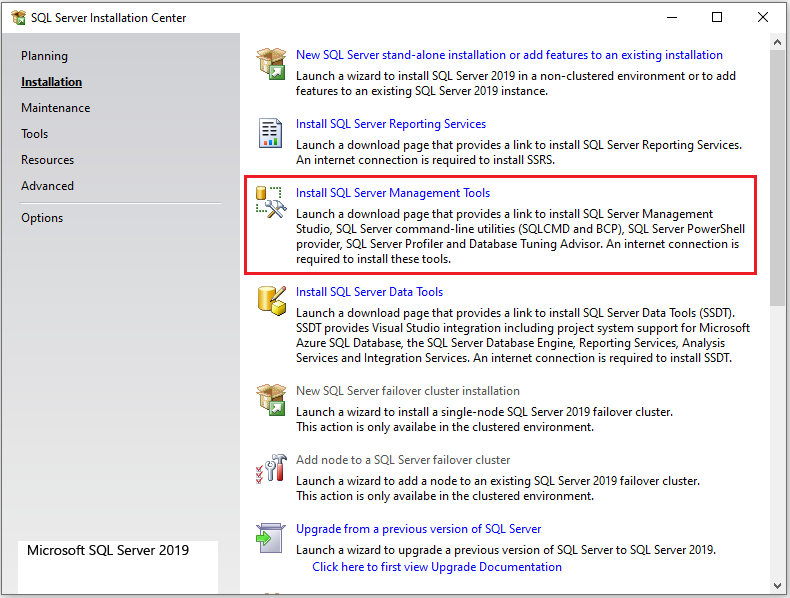
Step 2: Install SQL Server Management Studio.
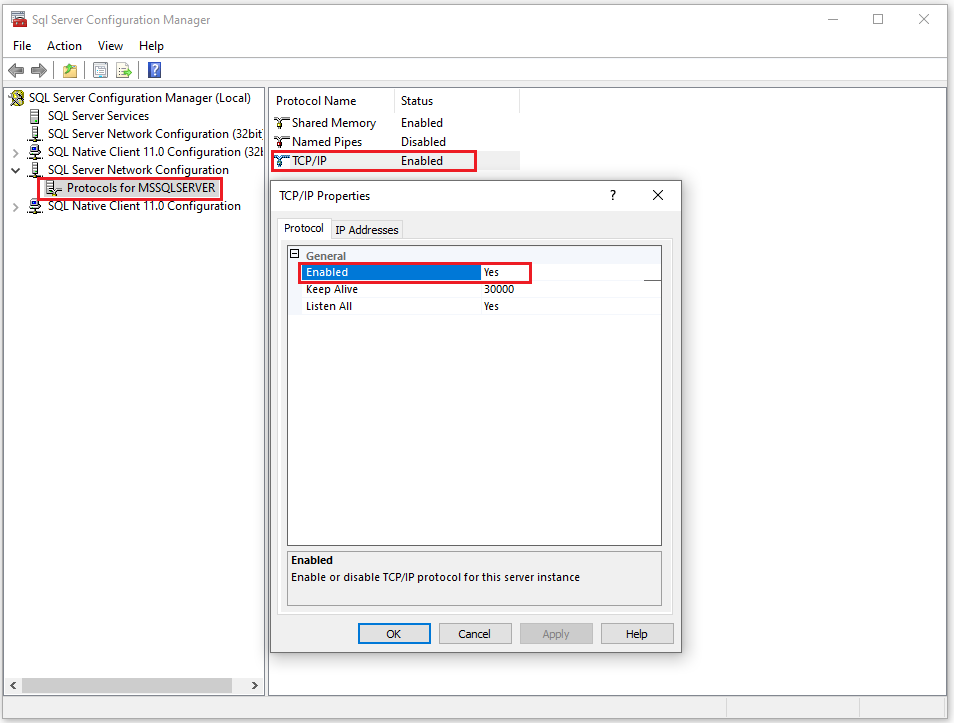
Open SQL Server Configuration Manager and enable the TCP/IP protocol. The TCP/IP protocol is disabled by default.
If you select to install the SQL Server version of the PowerBuilder demo database, a connection with the demo database on the local computer will be created using the OLEDB driver. OLEDB version 18 and 19 are supported now.
You can install the proper version before installing the product, or PowerBuilder Installer will automatically install version 19 (if neither OLEDB 18 nor 19 has been installed).
If the SQL Server version of the PowerBuilder demo database has been installed, while there is no SQL Server installed in the local environment, you can use an existing SQL Server in a remote server.
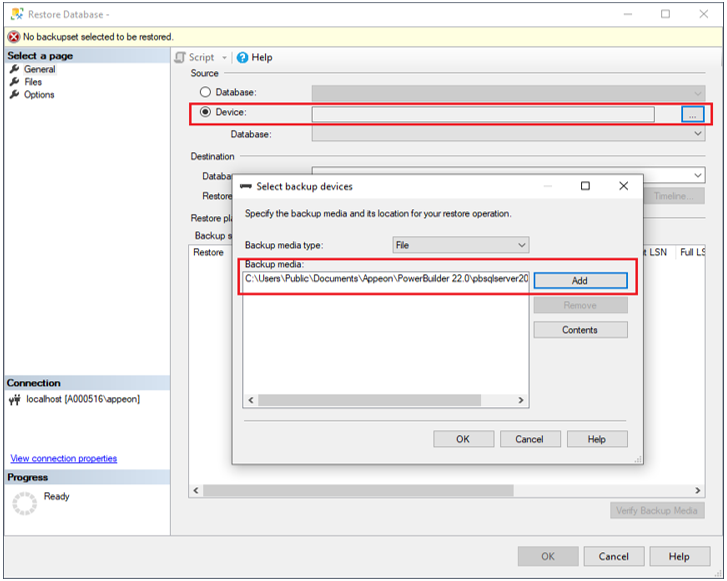
Step 1 -- Copy the database file to the remote server. The database file can be found in this location after installation: C:\Users\Public\Documents\Appeon\PowerBuilder 25.0\pbsqlserver2025R2.bak.
Step 2 -- In SQL Server Management Studio, right-click on Database and select New Database to create a new database.
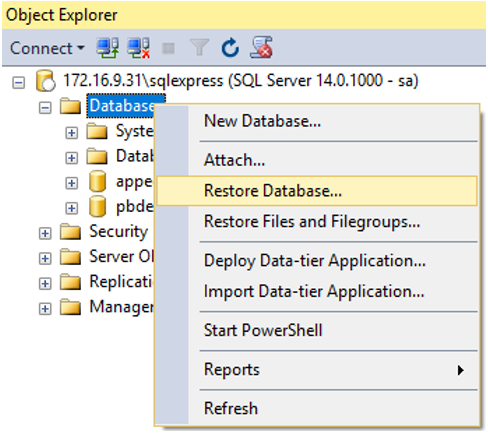
Step 3 -- Right-click on Database and select Restore Database.
Step 4 -- Select the pbsqlserver2025R2.bak file (copied in step 1) as the source database, and select the database (created in step 2) as the destination database.

Step 5 -- Click OK to restore the database.
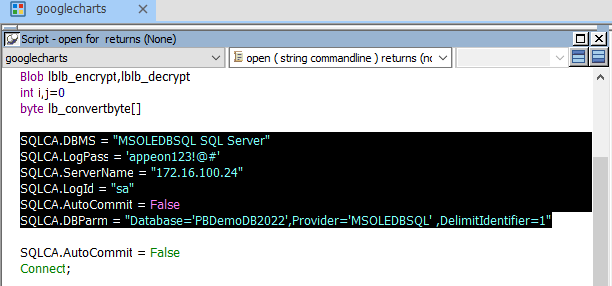
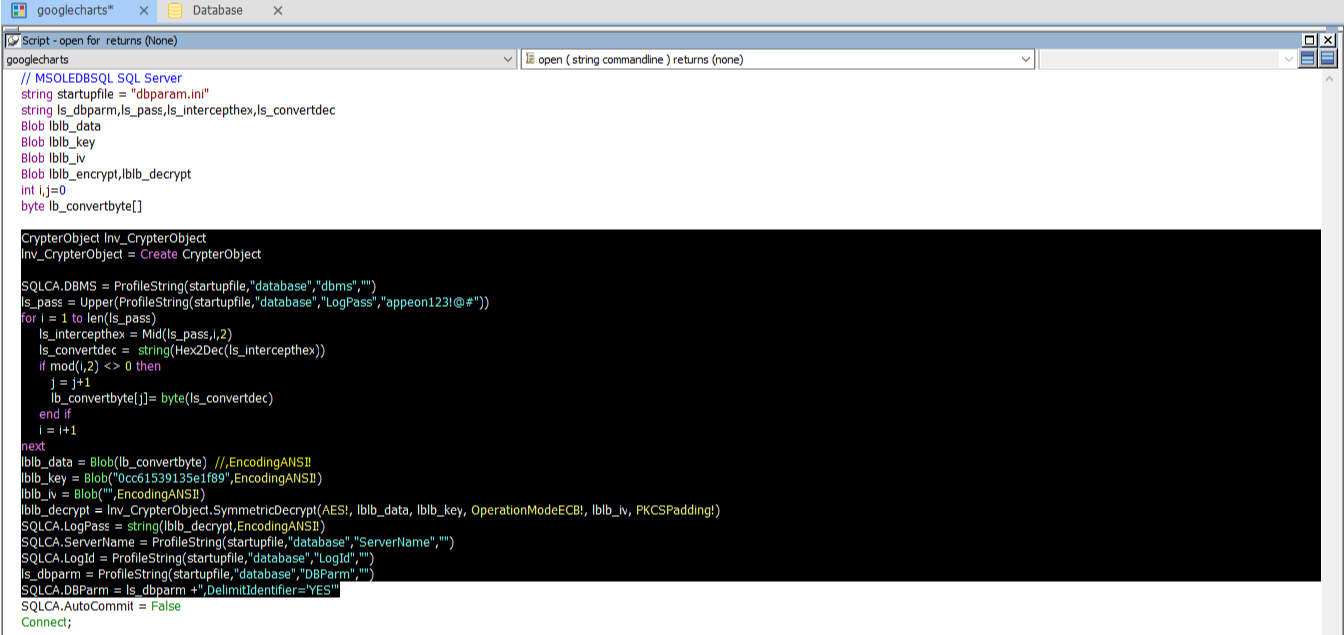
After you restore the database file in a remote server, you will now need to modify the demo application to connect with the demo database on the remote server.
For example, you can modify the demo application to connect with the demo database on the remote server via the following connection strings.
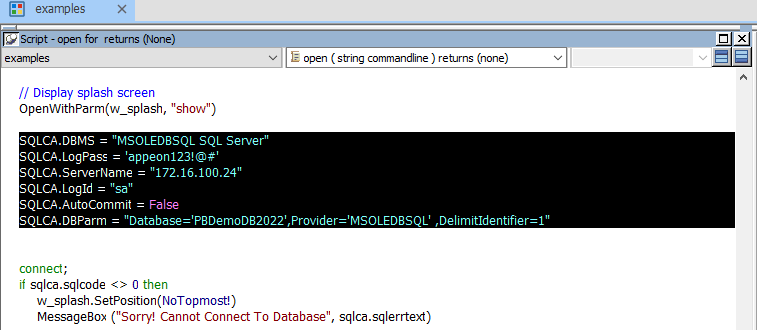
SQLCA.DBMS = "MSOLEDBSQL SQL Server"
SQLCA.LogPass = 'admin'
SQLCA.ServerName = "172.16.1.102"
SQLCA.LogId = "sa"
SQLCA.AutoCommit = False
SQLCA.DBParm = "Database='PBDemoDB2025R2', Provider='MSOLEDBSQL19', DelimitIdentifier=1"
To modify Example Demo:
Replace the following scripts in the Open event of the application object
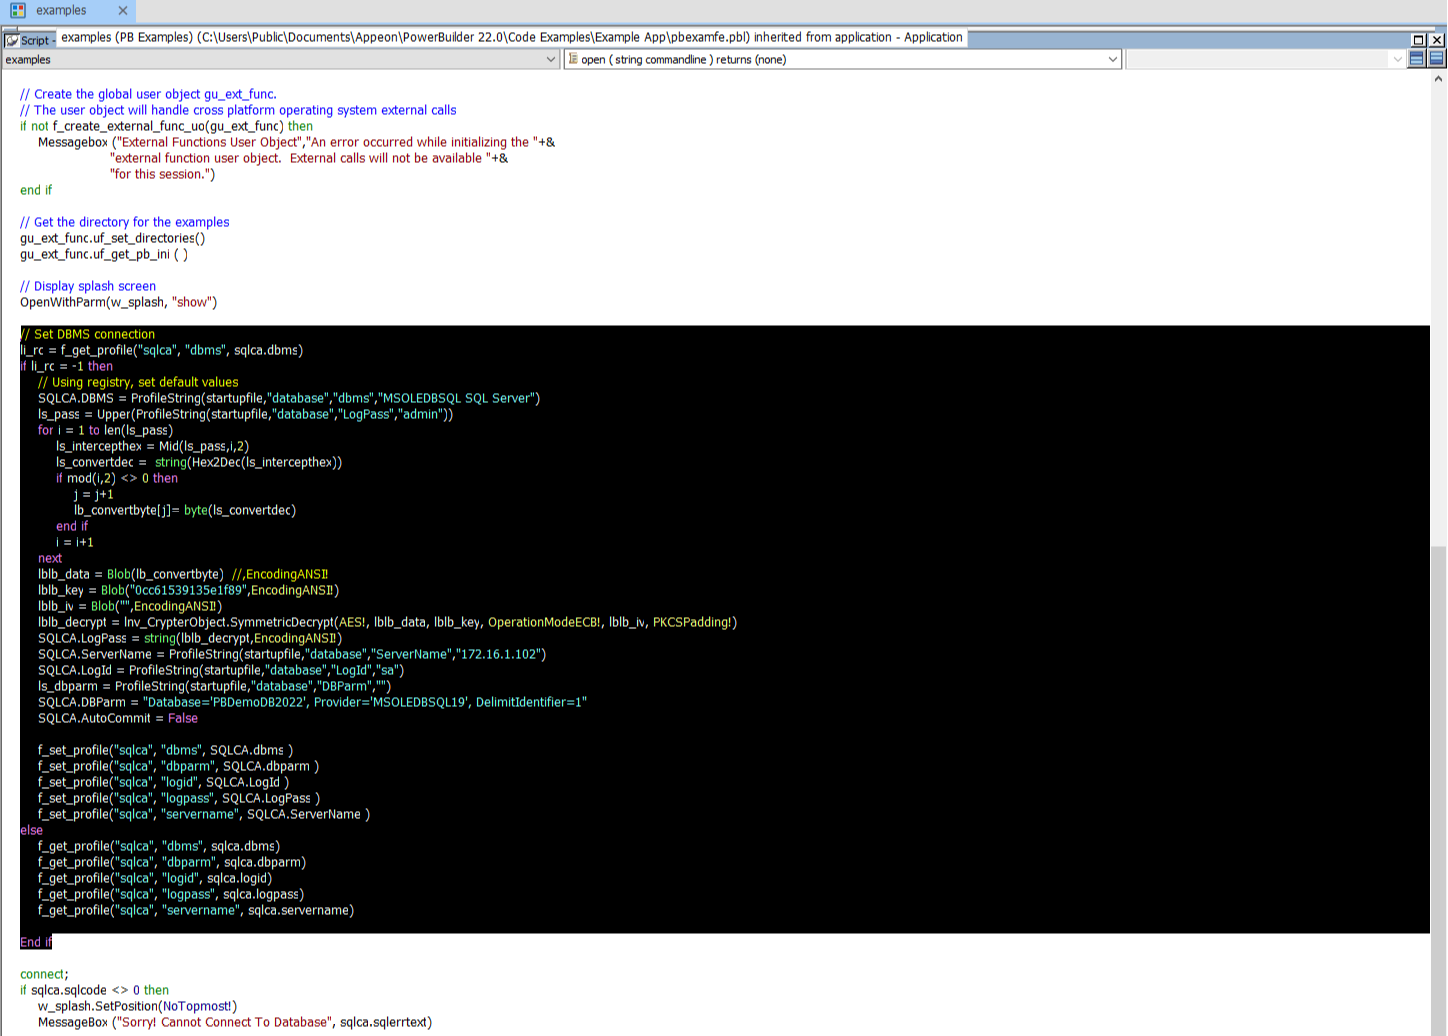
With the following scripts:
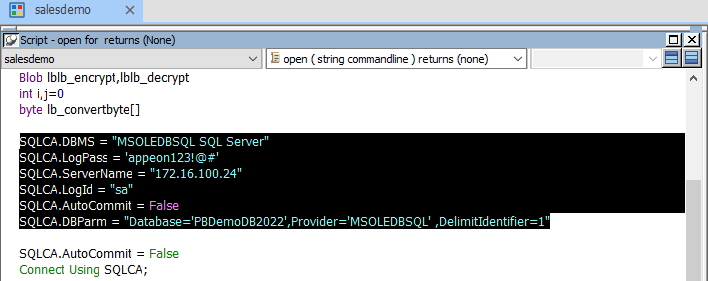
To modify Sales Demo:
Replace the following scripts in the Open event of the application object
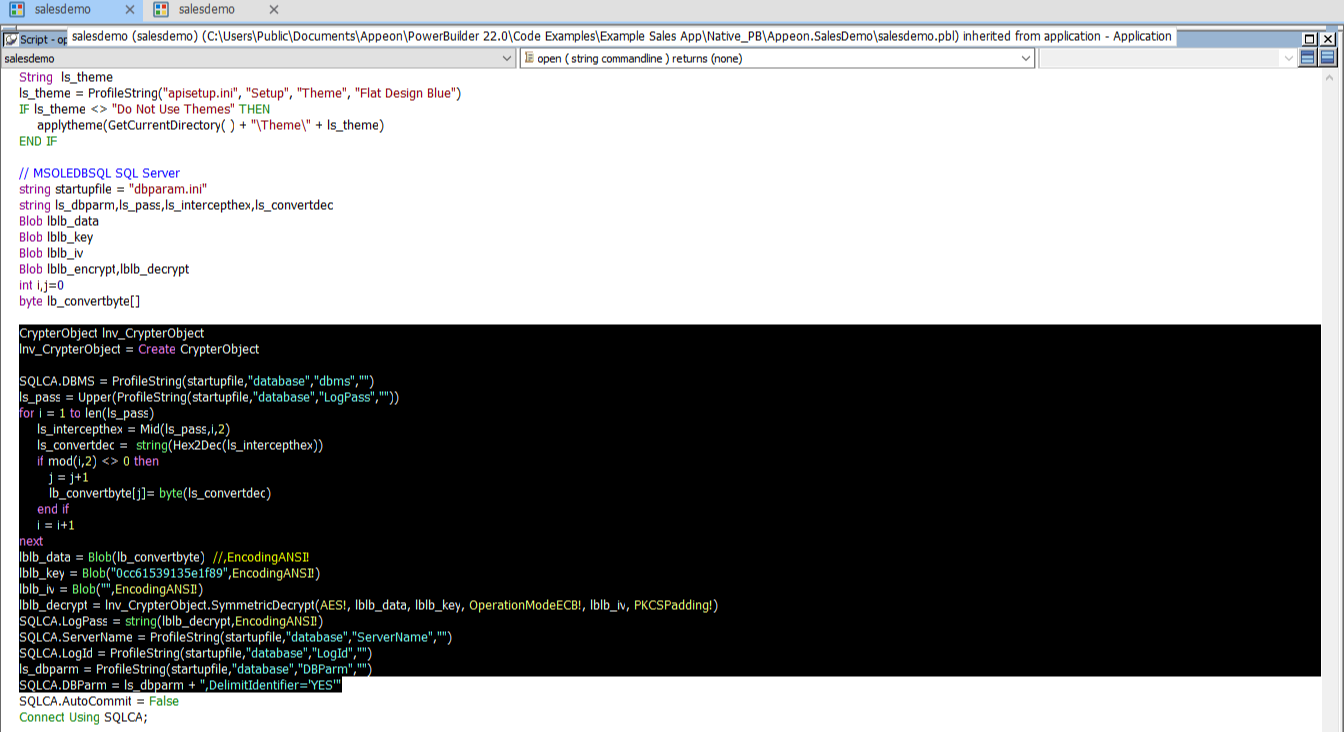
With the following scripts:
To modify Graph Demo:
Replace the following scripts in the Open event of the application object
With the following scripts: