When trying to launch the Web application, the IE page shows a "done" status on the lower left hand corner and then it stays blank. The ActiveX has been correctly downloaded and the "run now, or run after download" screen also successfully displayed, after this screen, all the files seemed to download but the application login screen never appeared.
Cause: By default, the Web server running on IIS 7.5 or later does not allow the following two types of files to be downloaded to a browser:
-
Files with file extension, but not specified in IIS
-
Files without file extension
Therefore, you would need to explicitly define these file types in IIS.
Solution:
Step 1: Find out what files of the Web application cannot be downloaded from IIS 7.5 or later.
-
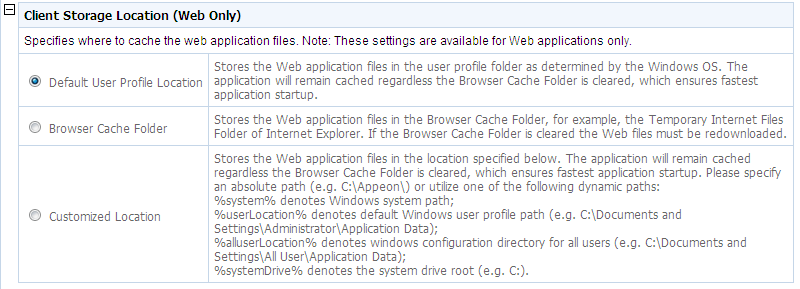
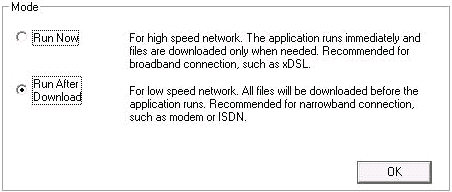
Go to AEM > Application > Client Features > Application name, and then set Allow user to select run mode to Yes.
-
On the same AEM page, find out where local Web files are stored. For example: C:\Users\appeon\AppData\Roaming\appeon.
-
Delete the local directory for the Web files. The folder is named after the Web application, for example, C:\Users\appeon\AppData\Roaming\appeon\localhost_Dotnet_<application-name>.
-
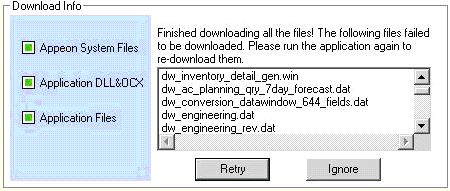
Access the Web application in IE, and select Run After Download.
-
In the Download Info window, make note of the type of files that cannot be downloaded, as you will then need to specify them in IIS explicitly.

Step 2: Set up the MIME types for files with file extension that cannot be downloaded.
-
Open IIS Manager. Expand the Web Site hosting the Web application, expand the Web application folder, then click the sub-folder which contains the files that cannot be downloaded.
The following table lists the sub-folder and what types of application files they contain, so you can easily determine which folder you will need to configure.
File type Folder name *.dat Located in the meta/merge folder. *.win, *.udo Located in the ole folder. *.dll, *.ocx Located in the plugin folder. *.bmp, *.jpg, *.ico Located in the image folder. f* Located in the merge folder. Suppose the *.win file cannot be downloaded, then click the "ole" folder.
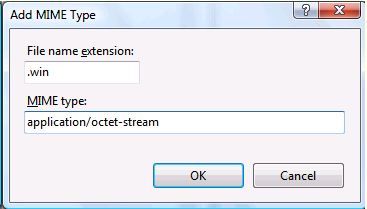
The following steps take the file extension .win as an example to show you how to create the MIME type for this file type. You may need to create multiple MIME types if there were more than one type of file extension listed from step 1.
-
In Features View, double-click MIME Types, then in the Actions pane, click Add, and then in the Add MIME Type dialog box, set the File name extension to, in this example, .win, and set the MIME type to application/octet-stream, and click OK.
Step 3: Set up both MIME type and Handler Mapping for files without file extension that cannot be downloaded.
-
Open the IIS Manager. Expand the Web Site hosting the Web application, expand the Web application folder, then click the "merge" folder.
-
In Features View, double-click MIME Types, then in the Actions pane, click Add, and then in the Add MIME Type dialog box, set the File name extension to * and set the MIME type to application/octet-stream. Click OK.
-
Click the "merge" folder again and then double click Handler Mapping in Features View.
The following steps take the file name f### (where “###” is a number) as an example to show you how to create the mappings for this file group. You may need to create multiple mappings if there were more than one group of these files listed from step 1.
-
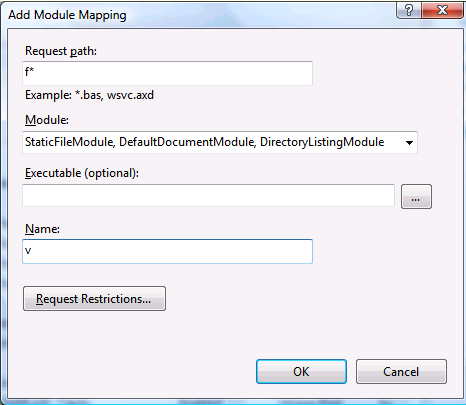
Click Add Module Mapping in the Actions pane, and then in the Add Module Mapping dialog box, fill in the fields with the following values:
-
Request path: f* (or whatever the names were of the objects that were listed in the "Download info" screen from the first step above.)
-
Module: StaticFileModule, DefaultDocumentModule, DirectoryListingModule
-
Name: v (you can put whatever name you want here, as long as it does not conflict with an already existing mapping.)
-
-
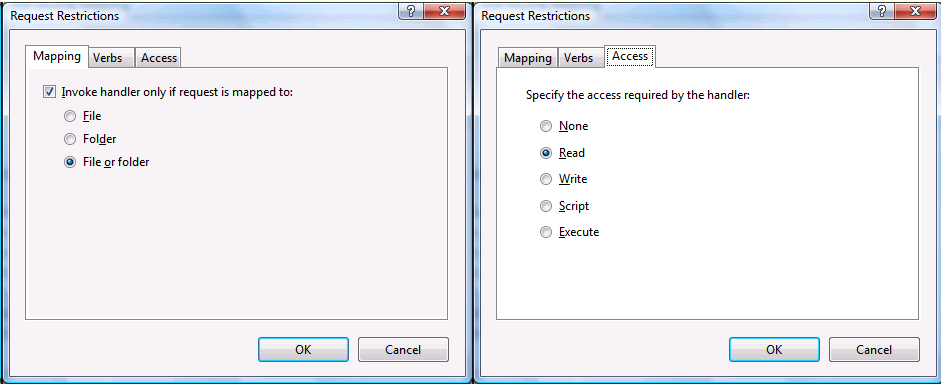
Then click the Request Restrictions … button; in the Mapping tab, check the box and select File or folder, and in the Access tab, select Read.
-
Click the OK button to complete the setup, the mapping will be listed as shown below.
-
Check that if there is a "StaticFile" module mapping for "*", as shown below. If it does not exist, follow step 4, 5, & 6 to create the "StaticFile" module mapping for "*".