CRUD Operations with .NET DataStore
Introduction
This tutorial will demonstrate how to generate a Web API from DataWindows using the new .NET DataStore project, and how to use these Web APIs to populate DataWindows in PowerBuilder by making use of the RESTClient object.
In this tutorial, you will learn to:
- Create a .NET Web API from PowerBuilder DataWindows
- Use the RESTClient object to consume these Web APIs
- Use the BatchDataObjects object to group multiple DataWindow updates as one single unit
Prerequisites
PowerBuilder 2025 and SnapDevelop 2025
Sample database setup
Install SQL Server Express or SQL Server 2012 or later.
Download the database backup file (AdventureWorks_for_sqlserver.zip) from https://github.com/Appeon/.NET-Project-Example-Database.
Restore database using the downloaded database backup file.
For how to restore the database, you can refer to the readme file: https://github.com/Appeon/.NET-Project-Example-Database/blob/master/README.md.
Web API creation
Open the Sample project and configure the database connection parameters in the n_dnds_demo_connectservice::of_getconnectioninfo(...) function.
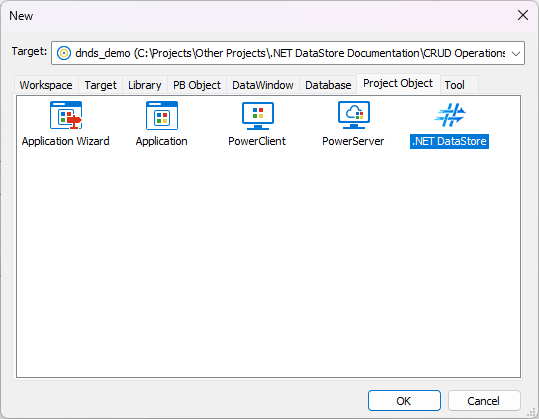
Add a .NET DataStore project to the workspace.
In the Project page, define the location for the Web API solution folder, and leave the rest of the settings as they are.
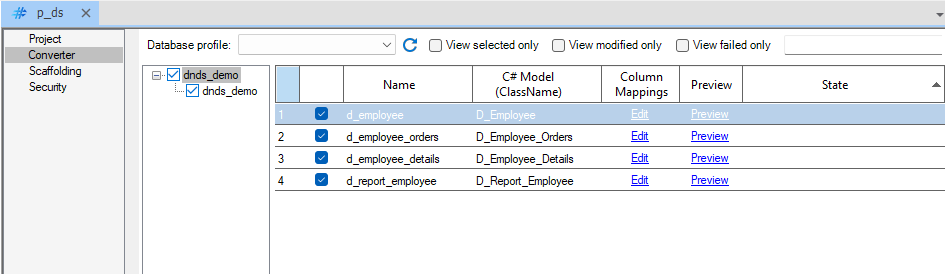
In the Converter tab, make sure all the DataWindows in the project are selected:
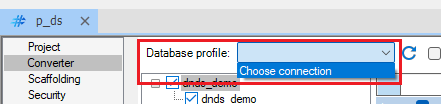
Configure the database profile from the DropDown menu and provide the connection to the Demo DB:
Next, in the Scaffolding page, the most important setting to pay attention to is the Template setting. This defines the interface that the generated Web API will offer to clients. The options are as follows:
| Template | Recommended usage |
|---|---|
| Repository_Pattern_Service_DataStore_for_PBClient | Will generate endpoints that conform to the interface compatible with PowerBuilder's RESTClient object, thus this is the best option when the Web APIs will only be consumed from the PB application using that object. |
| Repository_Pattern_Service_DataStore_for_NonPBClient | Will generate generic endpoints that exchange plain data objects which can be consumed by any client such as JavaScript, C#, Python, even PB (with a little bit of work). |
| Repository_Pattern_Service_DataStore_for_AnyClient | Will generate both sets of endpoints. Use this option when you plan to use the Web API from both PowerBuilder and other clients. |
For this demo we will leave the Repository_Pattern_Service_DataStore_for_PBClient option set and leave the rest of the settings on their defaults.
Since we're not making use of Web API security for this tutorial, we won't touch the Security page.
Finally, click on the Generate Project button:

After making sure there are no errors in the Errors panel, open the generated project on SnapDevelop with the toolbar button:

Exploring the Web API project
Click the Open solution in SnapDevelop button to open the C# project.

After SnapDevelop opens, if we expand the Controllers folder we will see two sets of controllers:
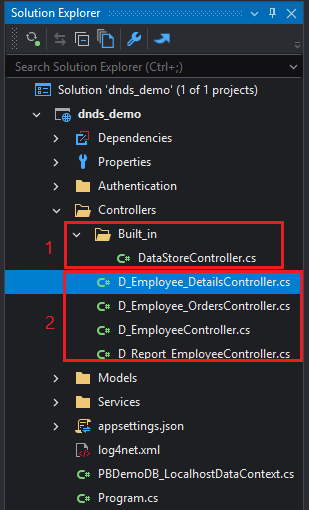
- The controller that will handle the calls from PowerBuilder 2025's RESTClient new functions: RetrieveWithModel, UpdateWithModel and RetrieveOrUpdateWithModels
- Individual controllers for each of the exported DataWindows. If the Repository_Pattern_Service_DataStore_for_PBClient or Repository_Pattern_Service_DataStore_for_AnyClient were selected, this controller will contain the endpoints that handle requests coming from RESTClient's Retrieve, RetrieveOne and Submit
Thanks to this, if you were already using the RESTClient object to consume a Web API that you converted and scaffolded manually in the past, you can keep using that code with Web APIs generated with the new .NET DataStore project.
Running the Web API
Click on the Web APIs button in the toolbar to launch the Web APIs.

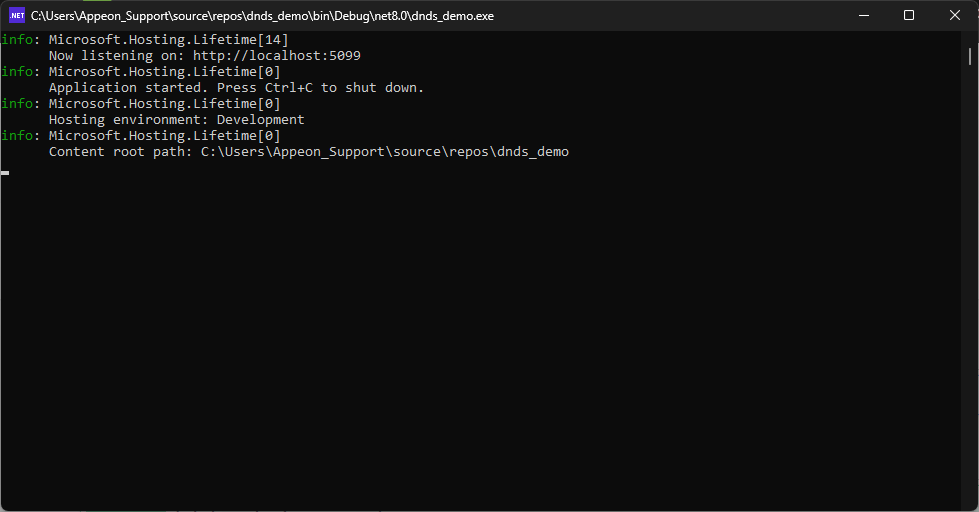
Once the Web APIs launch you will see a Console Window hosting it.
Then, a browser window will open with the Swagger UI showing the Web APIs' endpoints:
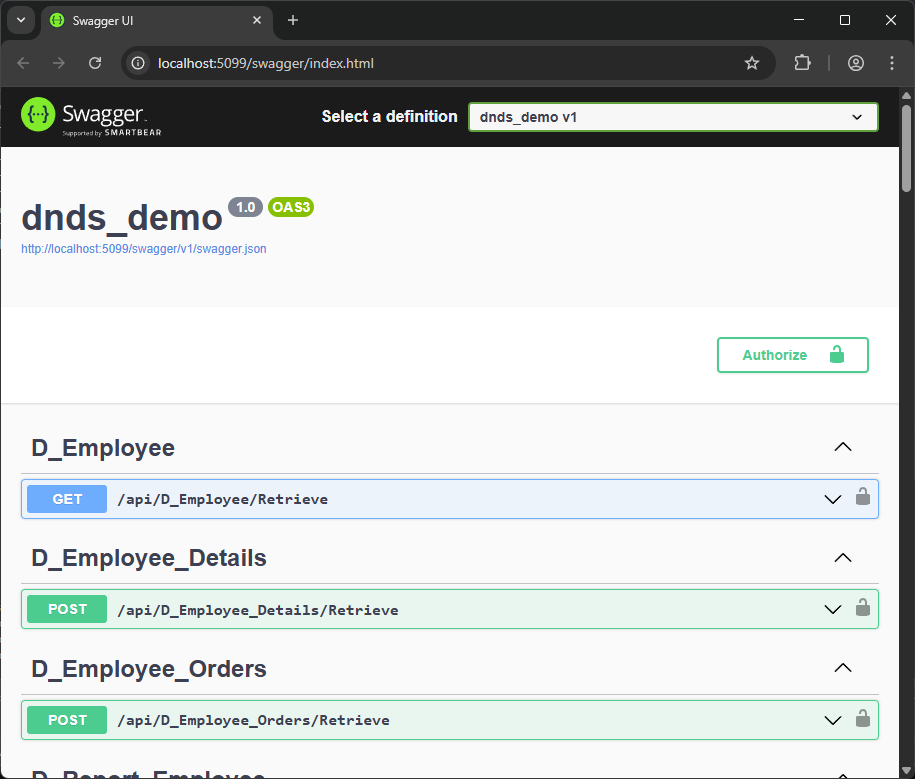
In this interface you can both explore the endpoints exposed on the Web API, and test them.
You can choose to test the Web API here or you can also use the Web API Tester tool on the Snap Develop IDE:
Test the generated Web API
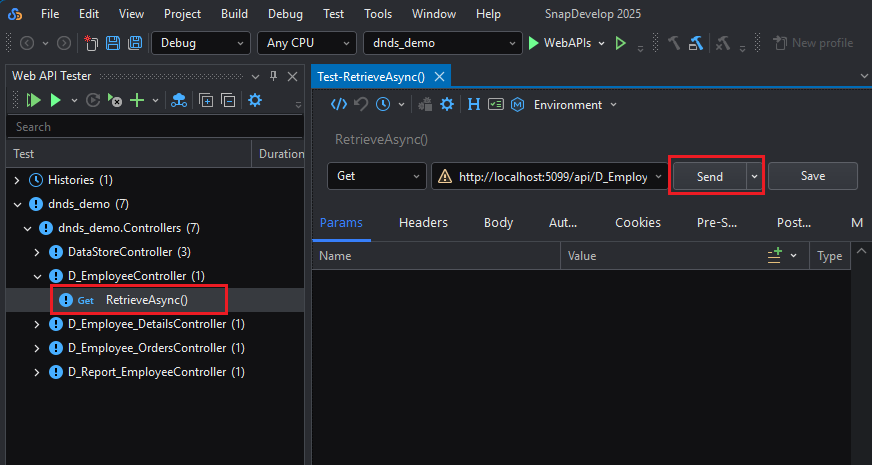
With the project opened in SnapDevelop 2025, go to Test> Web API Tester:

After the Web API Tester panel shows up, navigate to EmployeeController > RetrieveAsync() and double click it. Then click on the Send button:
Note: The endpoints available to test here will depend on the template you chose in the Scaffolding page of the .NET DataStore project. If you selected the Repository_Pattern_Service_DataStore_for_PBClient template then you might be able to test the Retrieve() endpoints from inside the Web API tester, but it might be difficult to test the Update() because of the contract that's required for the RESTClient object. However, if you used the Repository_Pattern_Service_DataStore_for_NonPBClient or Repository_Pattern_Service_DataStore_for_AnyClient you will have a much easier time testing them because there will be endpoints whose interface is flat. You can also test these endpoints in external tools such as Postman.
When prompted to start the project click OK.
You should be able to see the response from the Web API:

Now that we have ensured the generated Web API can retrieve data successfully, we can proceed to the next step.
Consuming the Web API from PowerBuilder
With PowerBuilder 2025, new functions that work with these types of .NET DataStore-generated Web APIs were added to the RESTClient object: RetrieveWithModel, UpdateWithModel and RetrieveOrUpdateWithModels. These functions group the process of retrieving the data from the Web API, unpacking the response, and inserting the data into the DataWindows into a single function call. In this section it will be demonstrated how to use these functions to replace the DataWindow's Retrieve and Update operations with calls to the Web API via the RESTClient object.
Launching the Web API
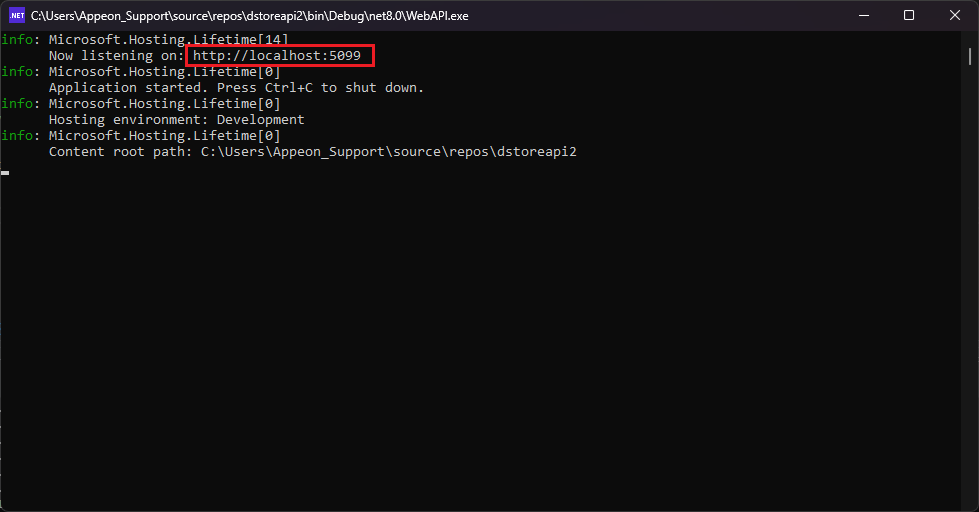
On SnapDevelop, click the button at the top to launch the Web APIs.
This will open a CMD window which will then launch the Web APIs under a kestrel server. Keep note of the URL under which it's being hosted for it will be used later.
Opening the sample project
Open the sample project and go to the n_dnds_demo_connectservice::of_getconnectioninfo function to configure the database server details:

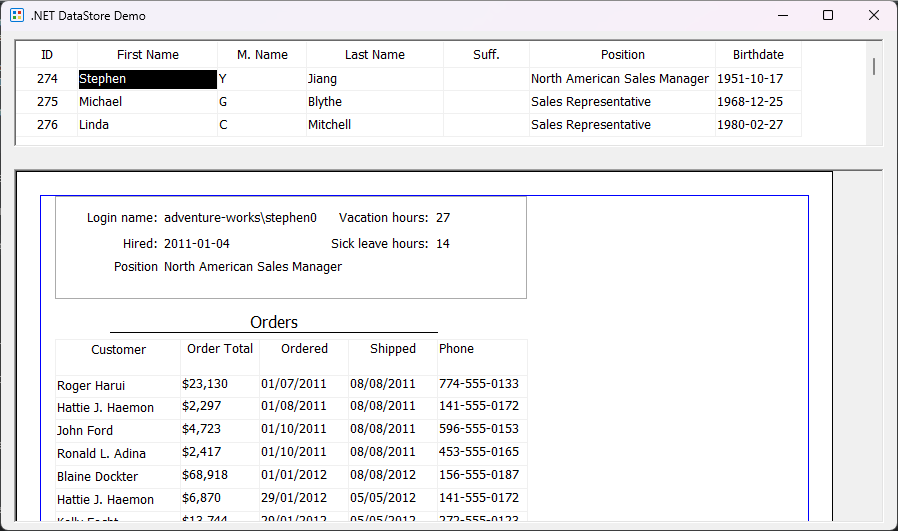
Run the project to make sure that it works correctly (selecting rows in the grid DataWindow will load data into the report, making changes into the master DW will show the save button).
Retrieving data with RetrieveWithModel
Retrieving the data from the Web API into a DataWindow is accomplished by making use of the RetrieveWithModel function of the RESTClient object. This function will contact the Web API endpoints, parse the return values and fill up the DataWindow view automatically. It allows us to pass the retrieval arguments required for the DataWindow, which we will be making use of.
Close the app (if it's running) and go to the w_dnds_demo_main::wf_loademployees() function.
Comment the Retrieve statement and add the following:
RESTClient lnv_client
Long res
lnv_client = create RESTClient

Try
	res = lnv_client.RetrieveWithModel(dw_employees, "http://localhost:5099/RetrieveWithModel")

	If res < 0 Then
		MessageBox("RetrieveWithModel", "Could not retrieve data from the Web API")

		Return
	End If
Catch (Exception e)
	MessageBox("Unexpected error", e.GetMessage())
Finally
	Destroy lnv_client
End Try
With only this change, the application will now source the DataWindow's data from our Web API instead of directly from the database. Run the application to test it. You might notice a slight delay in data retrieval which is normal when comparing a REST query vs a DB query.
Updating data with UpdateWithModel
Saving changes made to a DataWindow follows an identical process. To demonstrate this, open the w_dnds_demo_main::wf_updateemployee() function.
Comment the Update() statement and insert the following:
RESTClient lnv_client
lnv_client = create RESTClient
Long ll_res

Try
	ll_res = lnv_client.UpdateWithModel(dw_employees, "http://localhost:5099/UpdateWithModel", false)

	If ll_res < 0 Then
		MessageBox("Failed to update", "Update request failed with code " + string(ll_res))
		Return
	End If
Catch (Exception e)
	MessageBox("Update error", e.GetMessage())
Finally
	Destroy lnv_client
End Try
Note: The UpdateWithModel function behaves similarly to the previous example, however this function specifically allows the passing of a 3rd argument which specifies if the DataWindow should call
AcceptText()before the changes are sent to the Web API. If set totrueand the modified data does not pass validation, the call will fail. Because we already have anAcceptText()statement in the function, we'll set this to false.
Using BatchDataObjects to group multiple DataWindow operations into a single task
Sometimes it's necessary to group updates under a single transaction, meaning that if any of the steps fail, none of the already-performed updates are committed. This can also be achieved when using the RESTClient object to perform DataWindows updates from a Web API by making use of the BatchDataObjects object.
Go to w_dnds_demo_main::wf_loademployeereport() and comment the following lines:
ldwc_details.SetTransObject(SQLCA)
ldwc_details.Retrieve(al_employeeid)

ldwc_sales.SetTransObject(SQLCA)
ldwc_sales.Retrieve(al_employeeid)

dw_employees.Update()
Following these lines, create a RESTClient and a BatchDataObjects object:
RESTClient lnv_rest
BatchDataObjects lbd_objs

lnv_rest = Create RESTClient
Next, we'll add the DataWindow retrieves and the update to the BatchDataObjects:
lbd_objs.AddRetrieveObject(ldwc_details, al_employeeid)
lbd_objs.AddRetrieveObject(ldwc_sales, al_employeeid)
lbd_objs.AddUpdateObject(dw_employees, true)
Note: The AddUpdateObject function takes as a 2nd argument specifying whether or not we want it to perform an AcceptText() call on the DataWindow before performing the update. If the data validation fails, the update will be cancelled.
Finally, call the RESTClient's RetrieveOrUpdateWithModels function passing the BatchDataObjects instance like this:
Try
	ll_ret = lnv_rest.RetrieveOrUpdateWithModels(lbd_objs, "http://localhost:5099/RetrieveOrUpdateWithModels")
Catch (Exception e)
	MessageBox("Error sending update",  e.GetMessage())
	Return
Finally
	Destroy lnv_rest
End Try

If ll_ret < 0 then
	MessageBox("Error sending update", "Error code: " + string(ll_ret))
	Return
End If

If lbd_objs.geterrorindex() <> 0 Then
	MessageBox("Error performing update", lbd_objs.GetSQLErrtext())
End If
This will execute all DataWindows added previously under the same transaction, meaning if any of them fail, the changes will not be committed.
Now if we run the application again, it should behave the exact same way as it did before, the difference being, now it no longer connects to the database directly and instead goes through the Web API.
By separating the DataWindow updates from the main application we increase the security as we no longer need to distribute the database credentials with the executable; we no longer need to keep the database public to the internet and can be only visible by the Web API; and we can also integrate an additional security layer by making use of the included security templates with the freedom to define our own.
Finished project
You can download the finished project from here.