Now you look at the definitions for the Customer table in the Appeon Sample database. This helps you become familiar with the Database painter and the table you will use in the tutorial.
-
Click the Database (
 ) button in the PowerBar.
PowerBuilder connects to the database and the Database painter opens.
The Database painter title bar identifies the active database connection.
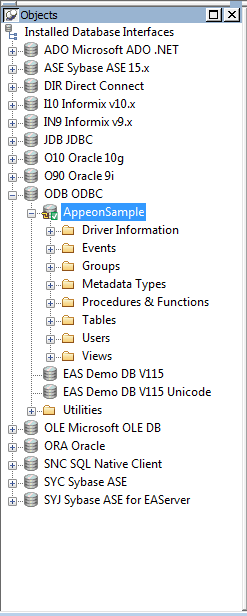
The Objects view of the Database painter displays all existing database profiles in a tree view under the Installed Database Interfaces heading. The AppeonSample database is visible under the ODB ODBC node in the tree view.
If the Objects view is not open
The Objects view is part of the default view layout scheme. To reset to this scheme, select View > Layouts > Default. You can also open an Objects view by selecting View > Objects from the menu bar.
-
Expand the AppeonSample database node in the Objects view.
Notice the folders under the AppeonSample database node.
-
Expand the Tables folder.
You see the list of tables in the database.
Table names might have a prefix
The table names in the Select Tables dialog box might have a prefix such as dba or dbo. This depends on the login ID you are using. You can ignore the prefix.
-
Right-click the customer table and select Add To Layout from the pop-up menu
or
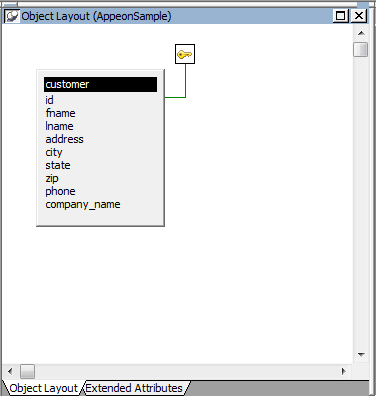
Drag the customer table from the Objects view to the Object Layout view.
Dragging an object from one view to another
When you start dragging an object from the Objects view to another view, the pointer changes to a barred circle. If you continue moving the cursor to a view that can accept the object, the barred circle changes back to a pointer with an additional arrow symbol in a small box. When you see this symbol, you can release the object.
The Object Layout view shows the table you selected.
-
Right-click the title bar of the customer table in the Object Layout view and select Alter Table from the pop-up menu
or
Right-click the customer table in the Objects tree view and select Alter Table from the pop-up menu.
The Columns view displays the column definitions for the table.
-
Right-click a column in the customer table in the Object Layout view.
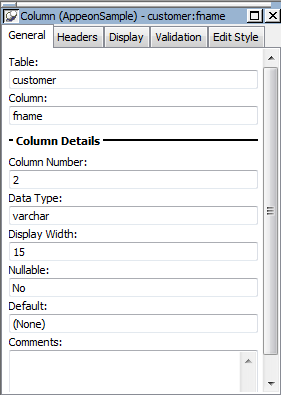
Select Properties from the pop-up menu. The Column view displays the details of the current column.
The title bar and tab headings for the Column view change dynamically depending on the current column selection. The title bar gives the database connection, the table name, and the column name.
The Column view for a column has five tabs, one for general database properties, one for column header information, and the others for column extended attributes.
About extended attributes
PowerBuilder stores extended attribute information in system tables of the database. Extended attributes include headers and labels for columns, initial values for columns, validation rules, and display formats.
You can define new extended attributes or change the definitions of existing extended attributes from the pop-up menus of items in the Extended Attributes view of the Database painter.
-
Close the Database painter.


