To package a server deployment project and the related settings, take the following steps:
Step 1: Start the servers, as the package wizard will pack settings of Appeon Server, AEM, and NVOs (if any).
Step 2: Click the Package
( ) button on the Appeon Developer toolbar to open the
Appeon Application Package Wizard.
) button on the Appeon Developer toolbar to open the
Appeon Application Package Wizard.
Step 3: Select or create a profile from the dropdown list box and click Next to proceed.
A profile is a configuration file containing configurations that you specify when packaging the application. You can select an existing profile or create one by entering a name in the text field. The profile will be automatically saved and listed for selection next time when you launch the Appeon Application Package Wizard again.

Step 4: Select the Package a Server Deployment Project radio button.
To package the mobile application to a stand-alone mobile app, select Package a Stand-alone Mobile Project and follow detailed instructions in Packaging a stand-alone mobile project.
To customize Appeon Workspace and then package Appeon Workspace to a standalone application, select Customize and Package Appeon Workspace and follow detailed instructions in Customizing and packaging Appeon Workspace.

Step 5: Select the profile of the application that you want to package and click Next.
Only applications that have been deployed will be listed here for selection. If the application you intend to package is not listed here, you would need to deploy the target application using the Appeon Deployment Wizard first (See Deploying PowerBuilder Applications).

The following table gives a brief introduction to the columns:
Table 36. Application Package Wizard
|
Column |
Description |
|---|---|
|
Selected |
Identical to the default application profile selected in the Appeon Developer Configuration window. |
|
Profile Name |
Identical to the application profiles configured in the Appeon Developer Configuration window. |
|
Mode |
Identical to the current mode the application profile is set to in the Appeon Developer Configuration window. It is recommended that the packaged applications should be available in Release mode, as this mode prevents most forms of reverse engineering, and like application packaging, it protects the author's intellectual property. |
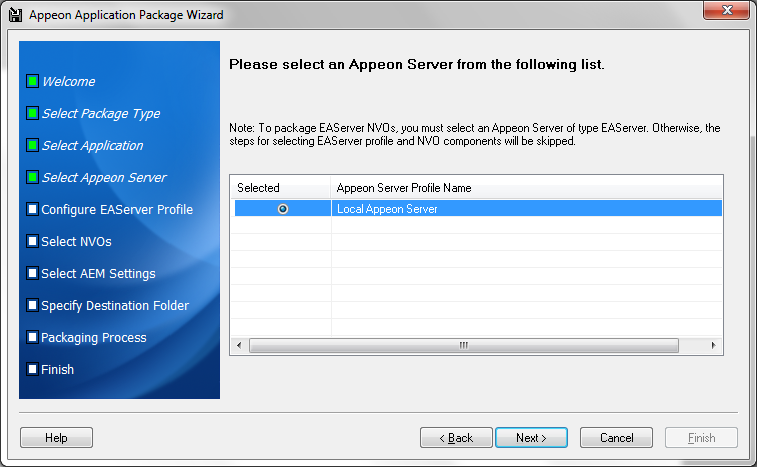
Step 6: Select the Appeon Server whose settings will be packaged and click Next.
The Appeon Server settings, such as the server type and the Appeon Server version, will be saved to the config.xml file in the INI folder of the generated package. If necessary, modify this file using the config.exe tool after the packaging is complete (refer to the section called “Modifying the deploy-config file”).
All the configured Appeon Servers selected into the default deployment profile in the Appeon Developer Configuration window are listed, as shown in the following figure.
The selected Appeon Server determines that its AEM settings will be packaged and that the packaged application can only be installed to Appeon Servers of the same version, such as 2015, but not necessarily the same type.
Step 7: If the selected Appeon Server is of type EAServer, select whether to package EAServer components.

If EAServer components are used in the application, select the Package EAServer Components option and then create connection profiles for EAServers which host the components. Follow instructions below to create EAServer profiles:
-
Click Add to create an EAServer profile.
-
In the Edit EAServer Profile dialog box, input the following connection parameters: profile name, host name or IP address, port number, user name, and password.
-
Click Test to ensure that the connection is successful.
-
Click OK to save the new EAServer profile.

Step 8: If the Package EAServer Components option is selected in the previous step, select which components to package and click Next.
The selected NVOs will be packaged as ComponentName.jar and saved under the /NVO/server profile name/package folder.

Step 9: Select whether AEM settings and data sources for the current application will be packaged and click Next.
The AEM settings will be saved in the AEM.xml file and data sources will be saved in the config.xml file.

Step 10: Specify the storage location for the generated package and click Next.
The generated package will be stored under a folder named "Application Profile Name_install" under the specified location.

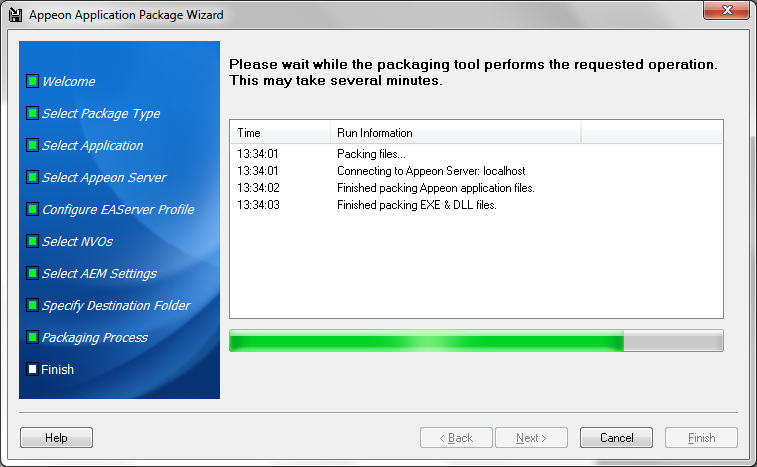
Step 11: Wait while the wizard is packing files and settings.
Step 12: Once the operation is complete, click Finish to exit the package wizard.
To view the log information generated during the packaging process, select the View Package Log box and then click Finish. The log file will be displayed.
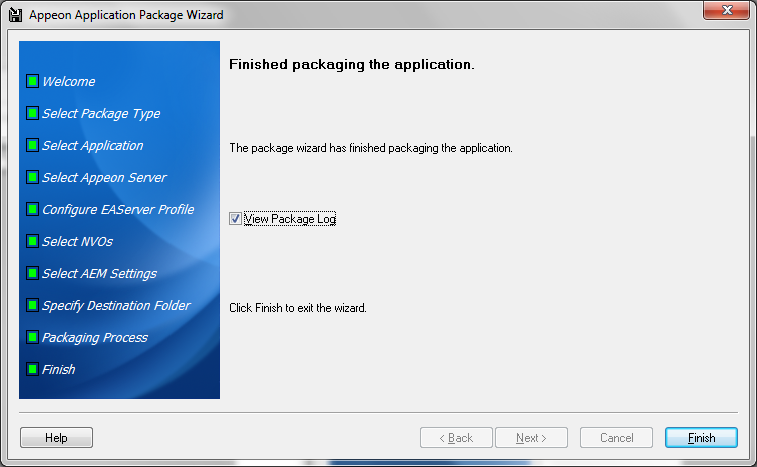
After the application is successfully packaged, all the necessary application files will be packaged into an executable deployment project under the "Application Profile Name_install" folder under the specified location. You can copy the deployment project to other computers and deploy the application to any Appeon Servers and Web Servers by following instructions in the section called “Installing and uninstalling an application to the server”.
